


.jpg) One of Atomic Green Lantern's most distinct features is his giant construct arm. I knew I had to nail it if I wanted to cosplay as the character, and I wanted it to actually look like a construct.
One of Atomic Green Lantern's most distinct features is his giant construct arm. I knew I had to nail it if I wanted to cosplay as the character, and I wanted it to actually look like a construct.Materials:
- Transparent Green Cast Acrylic - TAP Plastics
- 10 sheets of 10"x18"x1/8"
- 4 sheets of 12"x20"x1/8"
- Loctite Super Glue - about 2.5 of the 20g bottles
- PVC Pipe - 5" long, 1" diameter
- Nylon picture-hanging wire - 25'
- Green Elastic - 1" wide, 5'-6' used - Amazon
- 1/4" Chicago Screws/Screw Posts - 58 used - Amazon
- 5 Eyelet Screws
Total material cost: ~$170 (plus shipping)
Total time: ~3 weeks in real time, about 60 hours of actual labor
Tools:
- Rotary tool with cutting and sanding heads
- Started with a battery-powered Dremel, but that died mid-project so I switched to a wired Foredom
- Power Drill
- Heat Gun
- Orbital sander
- I could have managed with just the rotary tool for sanding, but this made it easier to sand my edges truly even, which was very required for strong edges
- Hot glue gun
- Could have gotten away without this, just used it to fill in a few spots where I didn't actually sand things as even as I thought I had
- Extremely fine sandpaper
- Just to get a different texture on the Lantern logos
Paper Planning
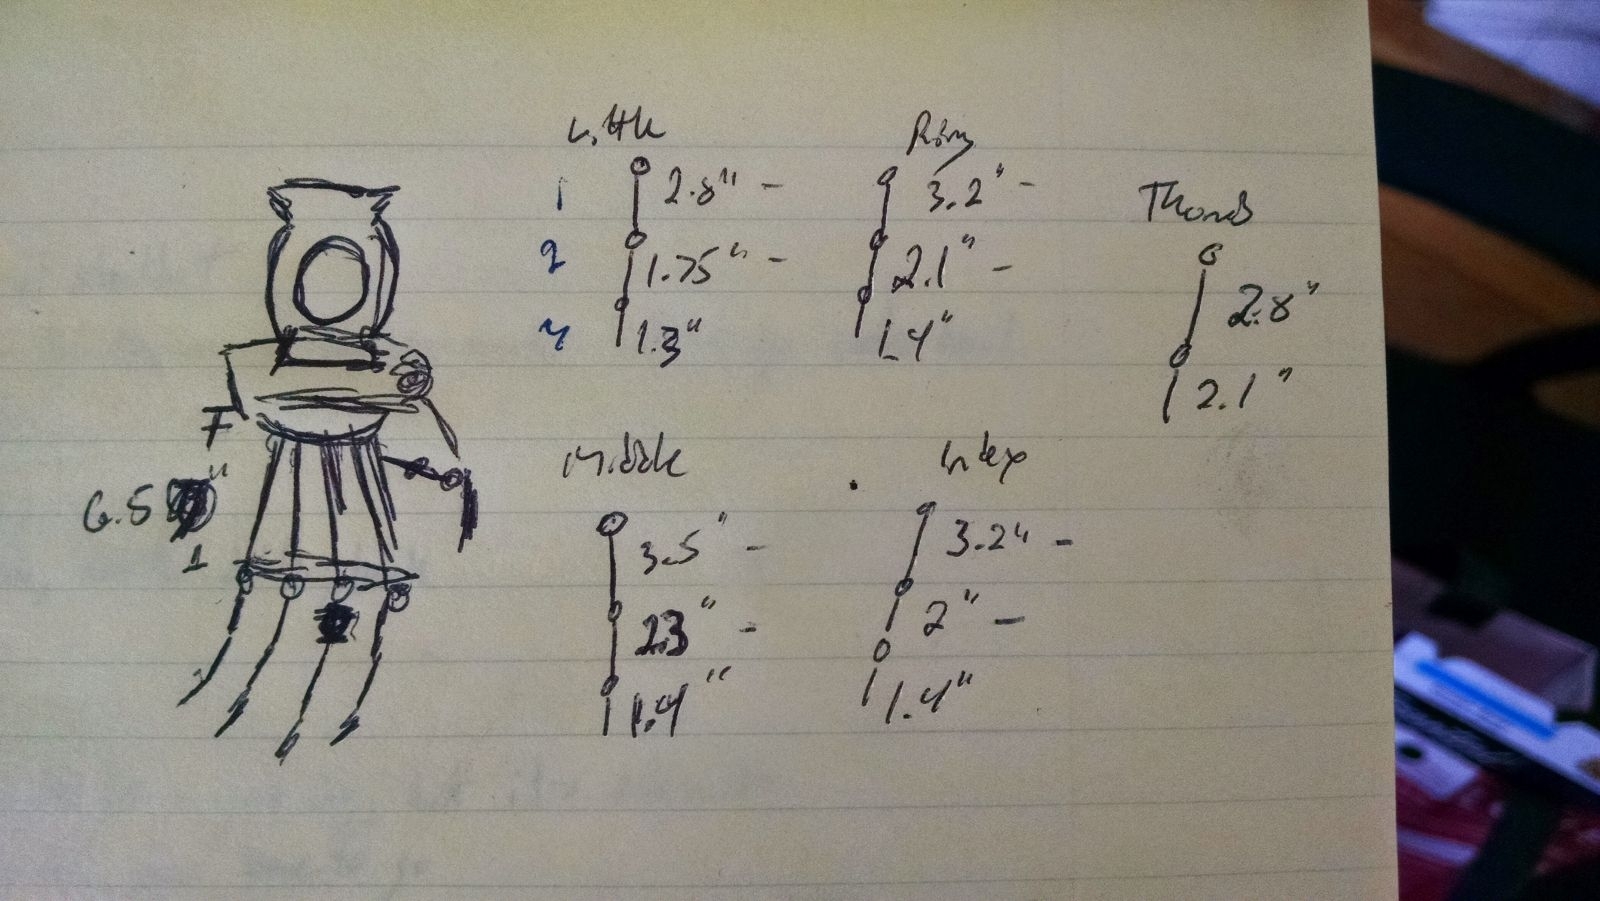
I'm going to be honest, this prop terrified me. It was so crucial to the overall costume, so complex, and so different from anything I had worked on previously that I spent a lot of time jotting down ideas on paper. The first thing I had to figure out was how big I wanted it to be. I did some back-of-the-napkin estimates of the in-game size of the arm. I also figured out that based on the size of the thing the elbow should probably fall where my wrist is so that when I bent my wrist that is how I would bend the elbow on the arm. I then estimated the size of each individual finger joint by figuring out how big I wanted the hand to be overall, then comparing that to the size of my hand, and maintaining the same proportions. I didn't actually start patterning anything out at this stage, but I had a whole lot of size estimates that I would reference for the rest of the build.
Hand Prototyping
Obviously the trickiest part of this entire thing was going to be the hand itself, since I wanted it to be articulated. I went looking for a good tutorial on how to do this, and the best one I found was this one about making a Terminator/Hellboy hand:
The big difference between this tutorial and my plans is that he was using PVC pipe which is super easy to work with AND tubular, whereas I was planning on using cast acrylic sheeting. I wanted to use the cast acrylic so that the entire arm had that translucent look that Green Lantern's constructs have; it had been my plan since I first thought about cosplaying this character, and what I figured would set my construct apart from all of the other Green Lantern constructs that have been made. The basic concepts seemed applicable, though - nest smaller pieces inside of bigger pieces at the knuckles, have elastic on the top and pull strings on the bottom. With that in mind I started building my first finger.
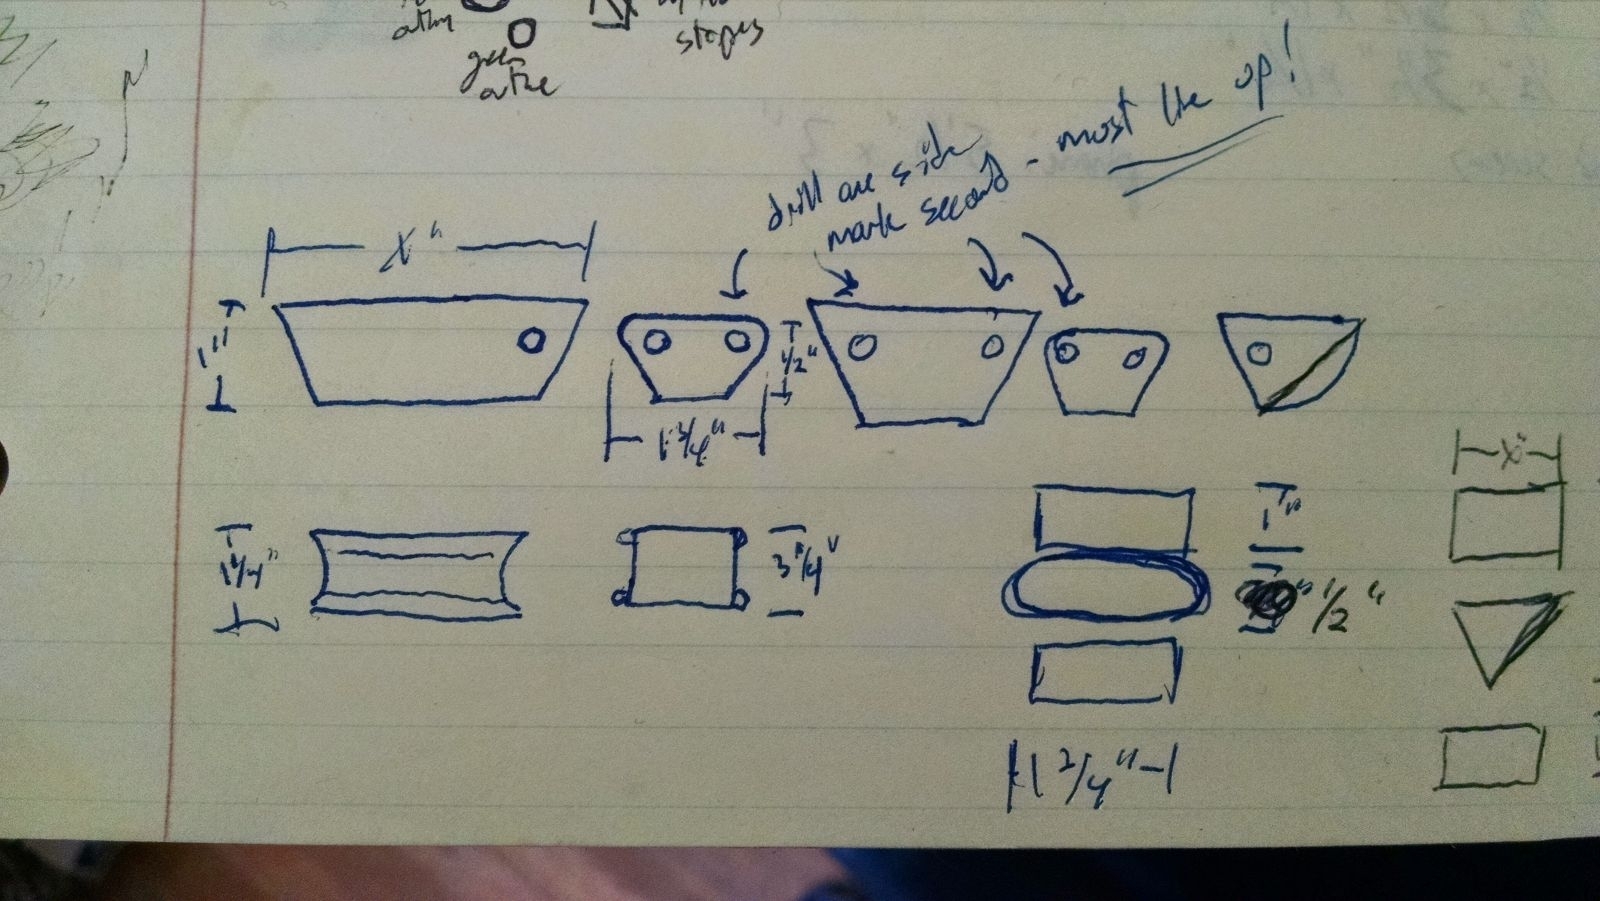
Saying I started my first finger isn't even accurate; I started the first joint of the first finger. I figured I would make them really resilient by having notches on the side pieces that inserted into the top and bottom pieces of the finger joint; this way any pressure from the sides would cause it to collapse because it would be pushing against something. I patterned out this idea, transferred it to my acrylic (thankfully the acrylic comes covered in protective paper which is perfect for drawing your patterns on), and headed to my workshop to cut it out. Well, turns out this was a lot of work. Because of the notches each side became four cuts instead of one, and sanding those notches to actually be 90 degrees was next to impossible. By the time I finished that first joint I knew the notched idea was foolish and time consuming, so I decided to just make all edges straight.
Another thing I learned with my first prototype was that my knuckle joint was too large. I had patterned it out to be exactly big enough to fit inside the finger joint, with 1/8" clearance on each side to accomodate the thickness of the acrylic. Stupidly this meant that there was no space for the finger joint to actually move around the knuckle. I re-patterned the knuckle and cut out a new plan, giving plenty of clearance on each side. This was also dumb since it meant my 1/4" screw posts no longer reached, and if I switched to the longer screw posts they didn't fit inside the knuckle. Eventually I realized that the width of the knuckle had to be flush with the inside of the finger joint, but the height of the knuckle should be just tall enough to let the screw posts fit with a comfortable amount of padding, but no more.
The final thing I learned when I made my first prototype was that I hadn't made the fingers wide enough. When I went to put my screw posts in they wouldn't actually fit. I roughly doubled the width of the fingers which also helped with the overall proportions of the hand. When I had been figuring out rough numbers during the paper planning stage I was focusing on lengths and not widths.
I made another round of patterns and cut out some acrylic. This time, since I was using notches, I could just use the orbital sander to smooth all of the edges. I quickly realized that the shape of the knuckles and placement of my drilled holes wasn't going to work; I had been trying to put the holes near the top of the finger joints, but for the knuckles to work they needed to be centered vertically. Since the knuckles needed to be centered there was no reason for them to have sloped edges, but rather they should have protruded edges to minimize where they hit the top and the bottom of the finger joints.
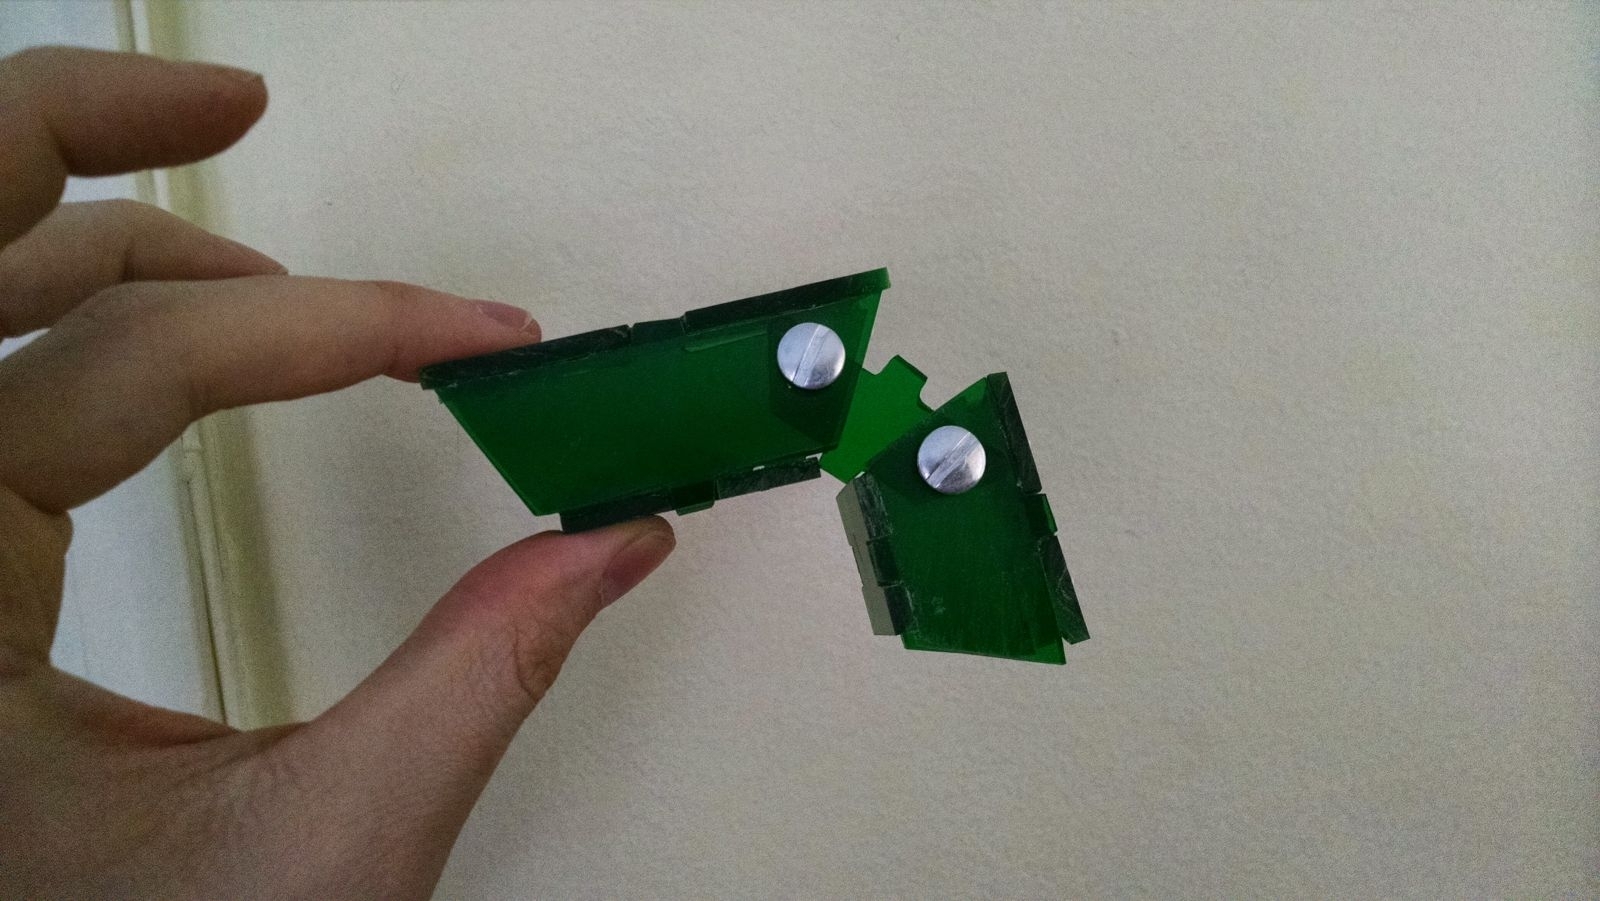
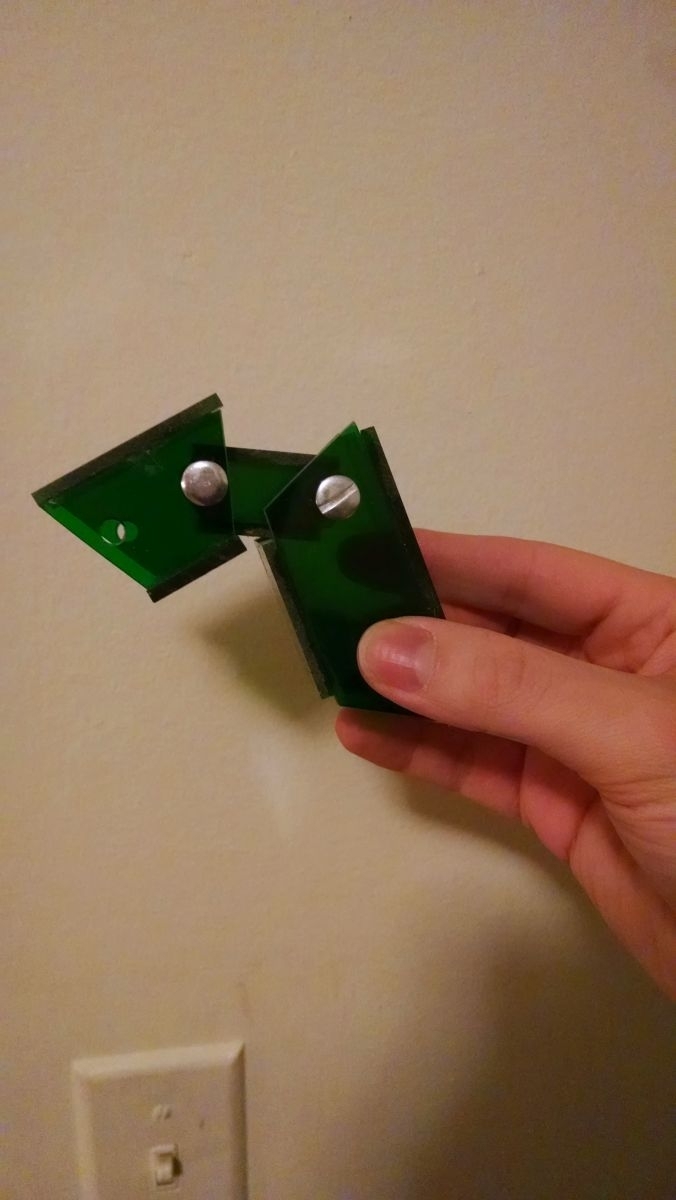
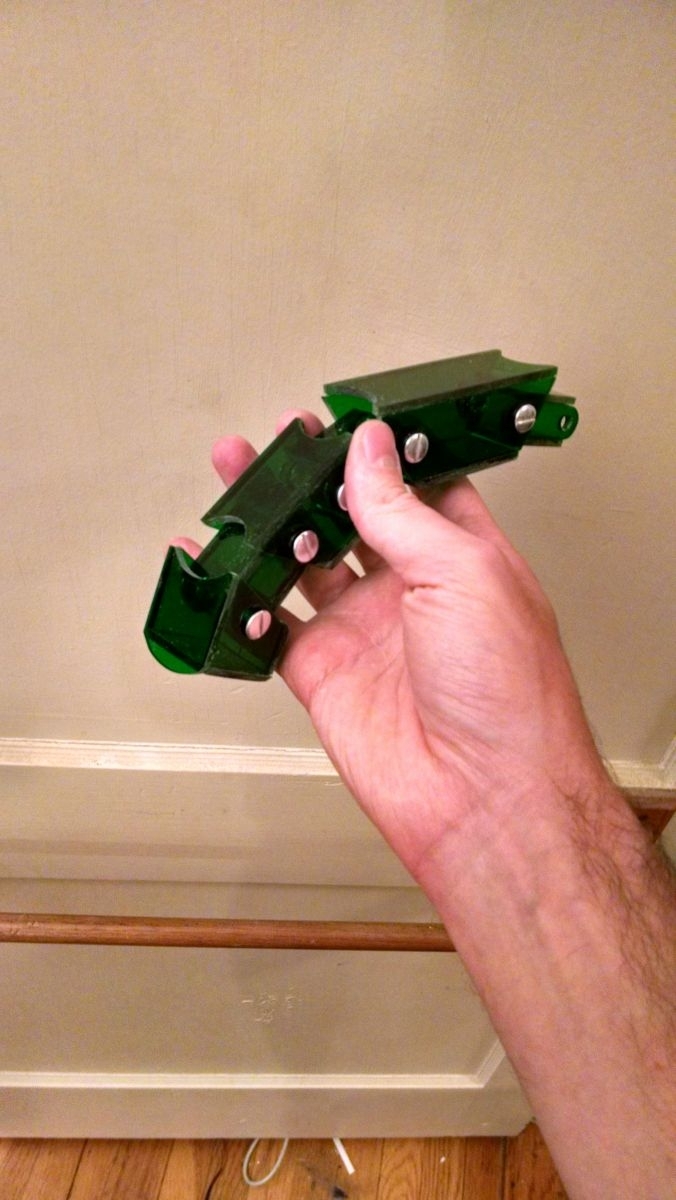
With one last round of patterning and prototyping I managed to build a couple of joints I was happy with. I cut out the four pieces of acrylic for each joint, drilled the holes in the side pieces for the screw posts, glued the four pieces together (making sure that they got glued perfectly perpendicular to one another), and added the screw posts. The joints had acceptable range of motion, and once the super glue was fully cured I couldn't break the finger joint even when trying.
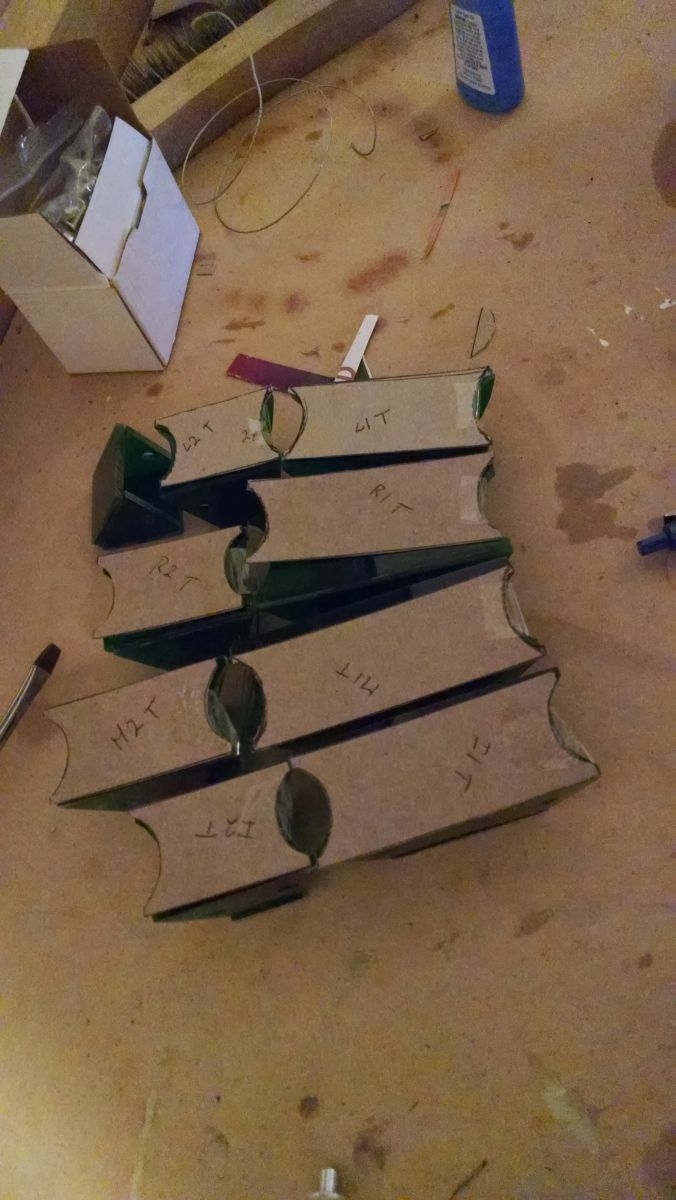
Hand Production
With a couple of joints that I didn't hate it was time to go ahead and put together the rest of the hand. I patterned out all of the finger joints individually (including the top, bottom, and two sides for each) and re-used the same knuckle pattern for all 14 knuckles. I transferred these patterns, cut them out, sanded them, drilled them, and glued them together. This was very time consuming. Once I had the first two joints of the four main fingers and the first joint of the thumb I had to figure out what I was doing for the tips of my fingers. I tried one idea (with a slanted tip) that ended up being too small to fit the screw posts. I ended up with a more squared design where the top piece had a curved tip to give the impression of a fingernail. I patterned, cut, sanded, drilled, and glued those and had all of the fingers ready for assembly. The only other piece left to add was the Lantern symbol on the middle finger which I also sanded with extremely fine sandpaper to give it a different texture so it would stand out from the rest of the arm.

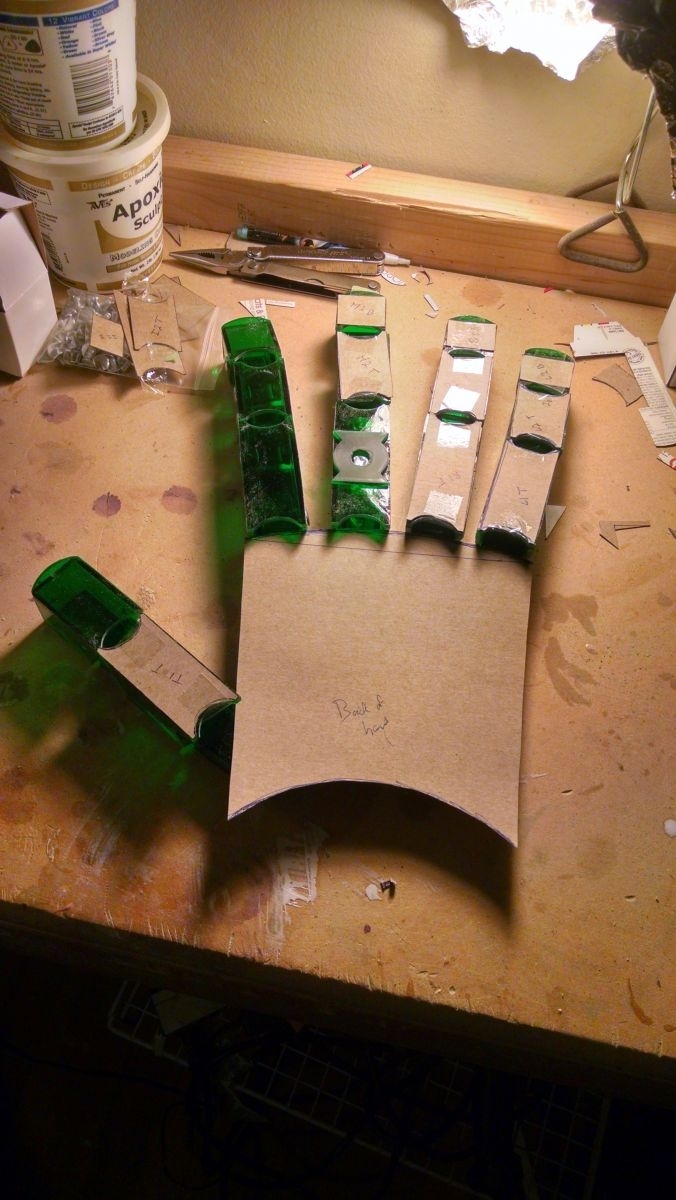
The main portion of the hand was simpler in that it didn't need to move at all. I patterned the pieces for that, referencing my paper planning from earlier, and spending a couple of hours to make sure I liked my plan. It took me a little while to come up with a good way to make sure the fingers attached to the palm. I ended up deciding on pieces of acrylic that extended from the base knuckle that would then be glued to the top of the hand. Then the palm would be glued on, further shoring up the finger connections. That couldn't be done until all of the fingers were properly assembled with their elastic and pull strings, so that was my next step.
I had actually purchased the elastic before building the fingers and didn't realize I had purchased elastic that was too wide. I ended up having to buy new elastic in a slightly different shade of green, but it worked fine. I cut the elastic in strips for each finger, making each one several inches longer than the finger in question. I then cut the nylon pull cord into 5 roughly equal lengths (I wasn't entirely sure how long it needed to be since I hadn't built the arm yet, so I erred on the side of stupidly long). I did a quick test on one of my prototype fingers with a scrap of the elastic to make sure the super glue would be strong enough to hold the elastic to the acrylic; after thorough testing I was impressed with how well it held and proceeded to glue one end of each piece of elastic to the tops of the fingertips.
I then drilled a tiny hole in the bottoms of each fingertip so I could tie the pull cords to them. With the elastic and the pull cord firmly in place I proceeded to fully assemble the fingers from the top down, making sure that the elastic stayed on top of the knuckle joints and the cord stayed on the bottom. Also, to make sure the screw posts didn't come unscrewed with use (which is a problem I've had with them on costumes in the past) I put a tiny drop of superglue inside each screw post as I tightened them so they would never come undone. This did backfire once when I put in too much and accidentally glued a knuckle to a finger, but I was able to break the glue's bond and sprayed the area with WD-40 to make it work correctly.
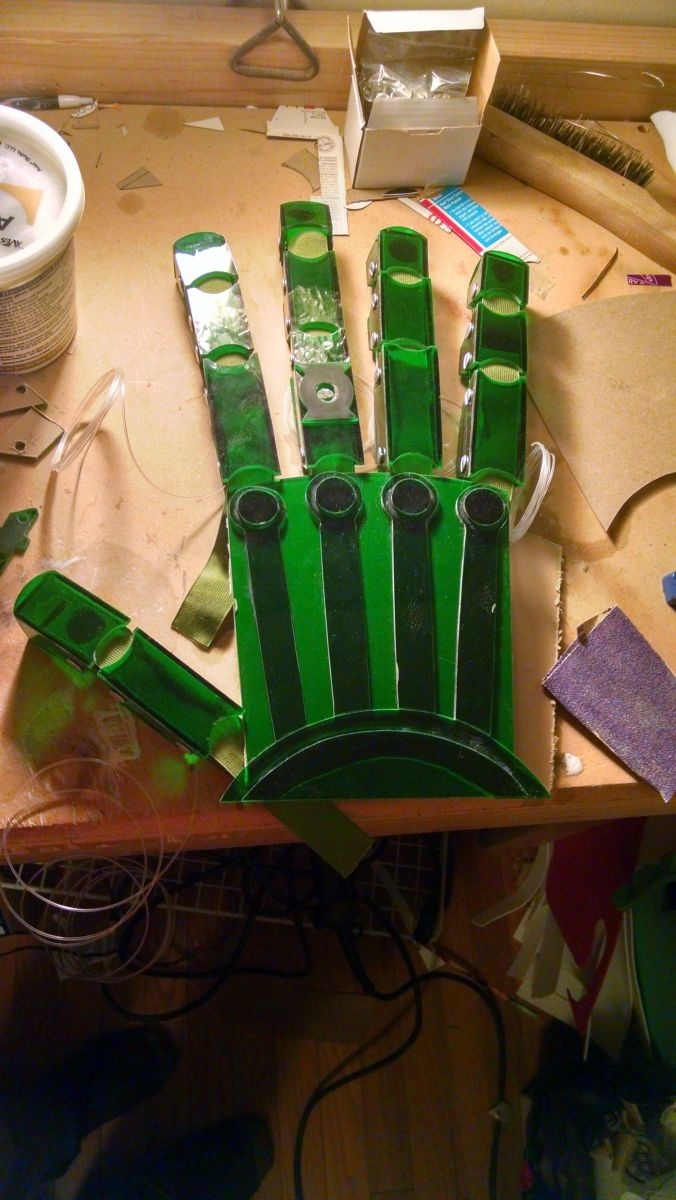
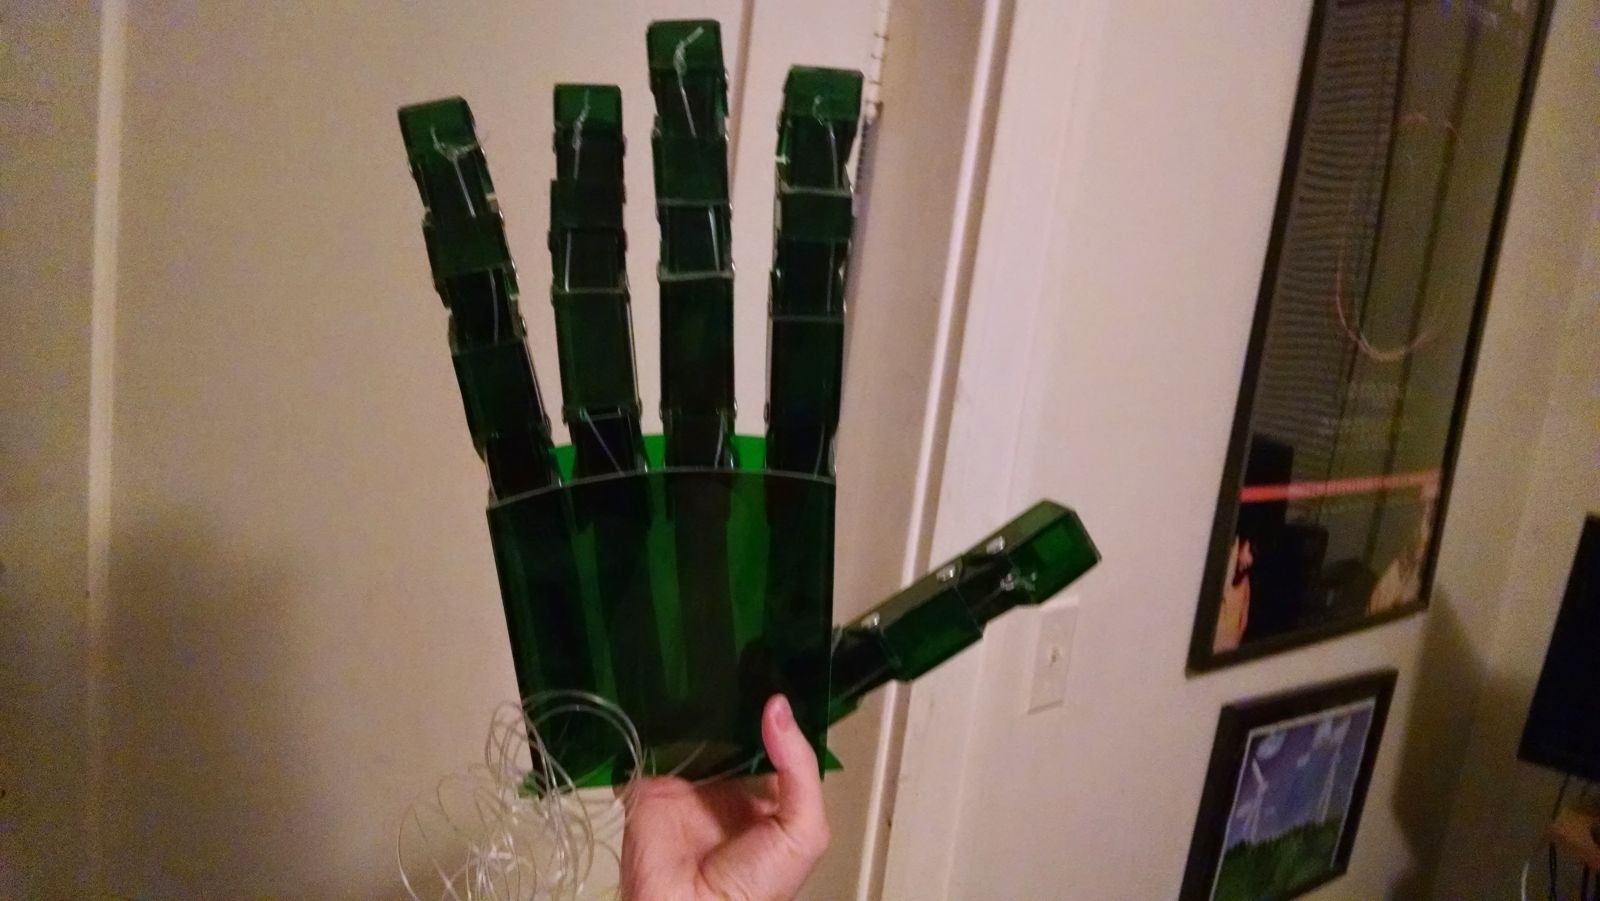
With the fingers all assembled with pull strings and elastic I just had to glue them down to the top of the hand, and assemble the rest of the hand itself. The thumb required a bit of extra work to get it where I wanted it because of how it was angled. I also added some decoration to the back of the hand for the tendons and - boom! - the hand was finished.
The Forearm
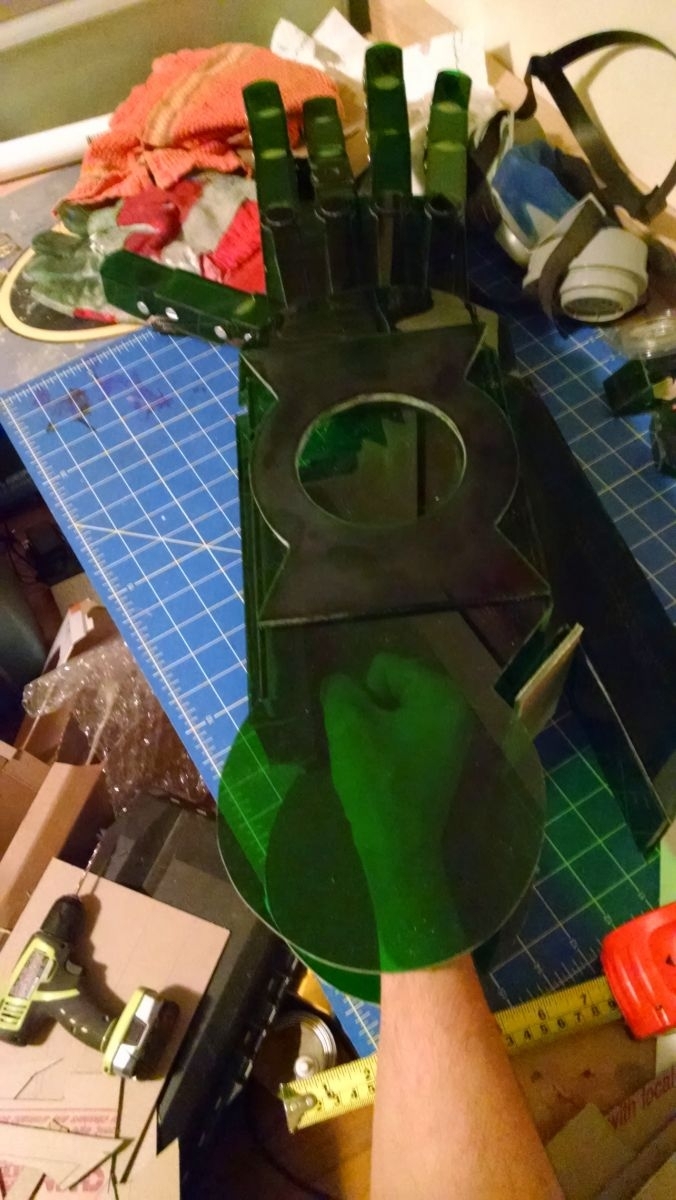
Compared to the hand the rest of the arm was a piece of cake. A time-consuming, stressful piece of cake. I went back to my paper planning and did a ton of sketches of this section. I had actually already done a ton of sketches of the forearm, but after finishing the hand and patterning out the rest of the arm I quickly realized I did not have enough acrylic to do everything I had in my head. I probably also didn't have enough time. So I started simplifying, planning the bare minimum of what was necessary for the arm to function and look vaguely interesting. With that in mind I simplified a lot of the curved or slanted pieces to be more box-shaped (though I kept the curved wrist piece because I didn't think it would look right without it). I also made sure to build the entire forearm large enough such that my hand could fit inside. This meant building it out in several distinct levels, but hollowing out all of the inner pieces. This gave space for my hand, made the arm lighter overall, and let me use the hollowed out pieces for other, smaller pieces of the arm.
The wrist piece was the trickiest piece of the forearm, just because it had curved sides. I had to cut out the rectangular pieces, then I heated them with my heat gun and bent them by hand (while wearing leather gloves so I didn't burn myself). I then traced the resulting curve to create the pattern for the sides of the wrist. Those sides then had to have a hole cut out on either side to fit the hand in the front and the rest of the forearm in the back; these holes also needed to be exactly the right size because they would be supporting the weight of the hand. To be safe I also added a cross piece that passed through the wrist section directly connecting the hand to the forearm.
Before I completely glued the forearm closed I needed to run my pull cables to the right position so I could reach them with my hand, and add the loops for my fingers. I also wanted the cords to have individual channels, so I grabbed some spare eyelet screws I had laying around and attached those to the forearm. They were actually so small that I didn't have a drill bit that was the right size, so I ended up using my smallest available bit, filled the hole with hot glue, then shoved the eyelet screw through the hole. I then coated it with more hot glue. This seems to have worked. I fed the cords through the eyelets, put a knot in the cord to prevent them from sliding back through, and then tied off the loops. I used Perfection Loops. I then trimmed off the excess and could operate my hand!
With the hand operational I could glue the rest of the pieces of the forearm together. I also cut out a double-layered Lantern symbol to attach to the top which I sanded down with the ultra fine sandpaper, similar to the Lantern symbol on the middle finger. The corners of this thing are kind of stupid sharp, especially since the bottom of the symbol extends over the wrist. I definitely sliced up my hand during PAX East when I went to support my right hand with my left and accidentally grazed the corner of the Lantern symbol.
The Upper Arm
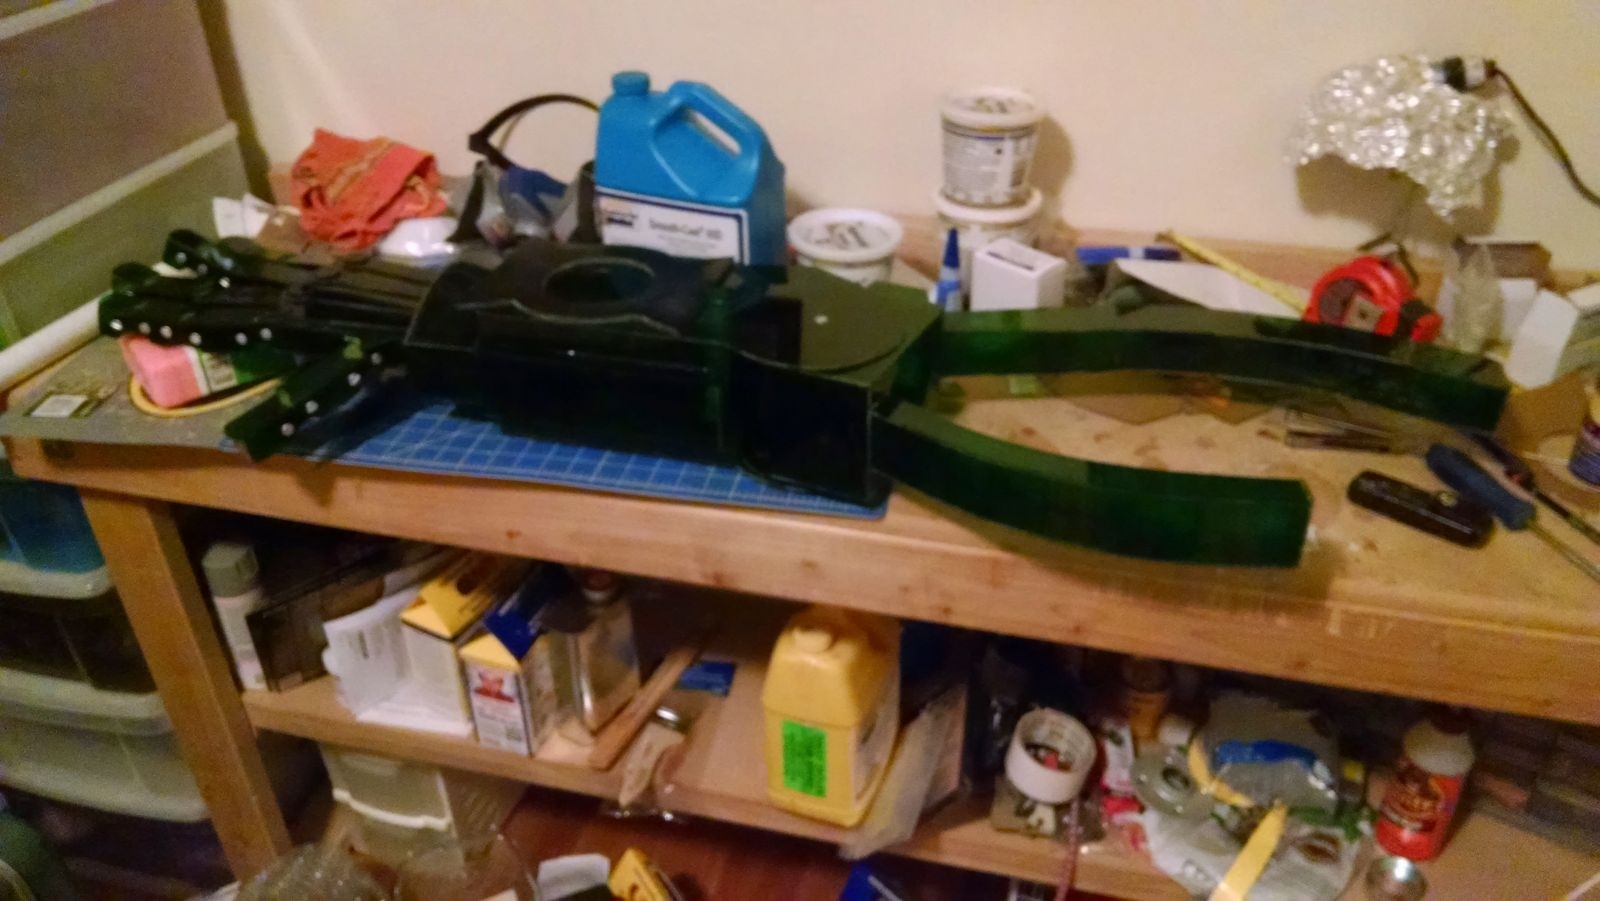
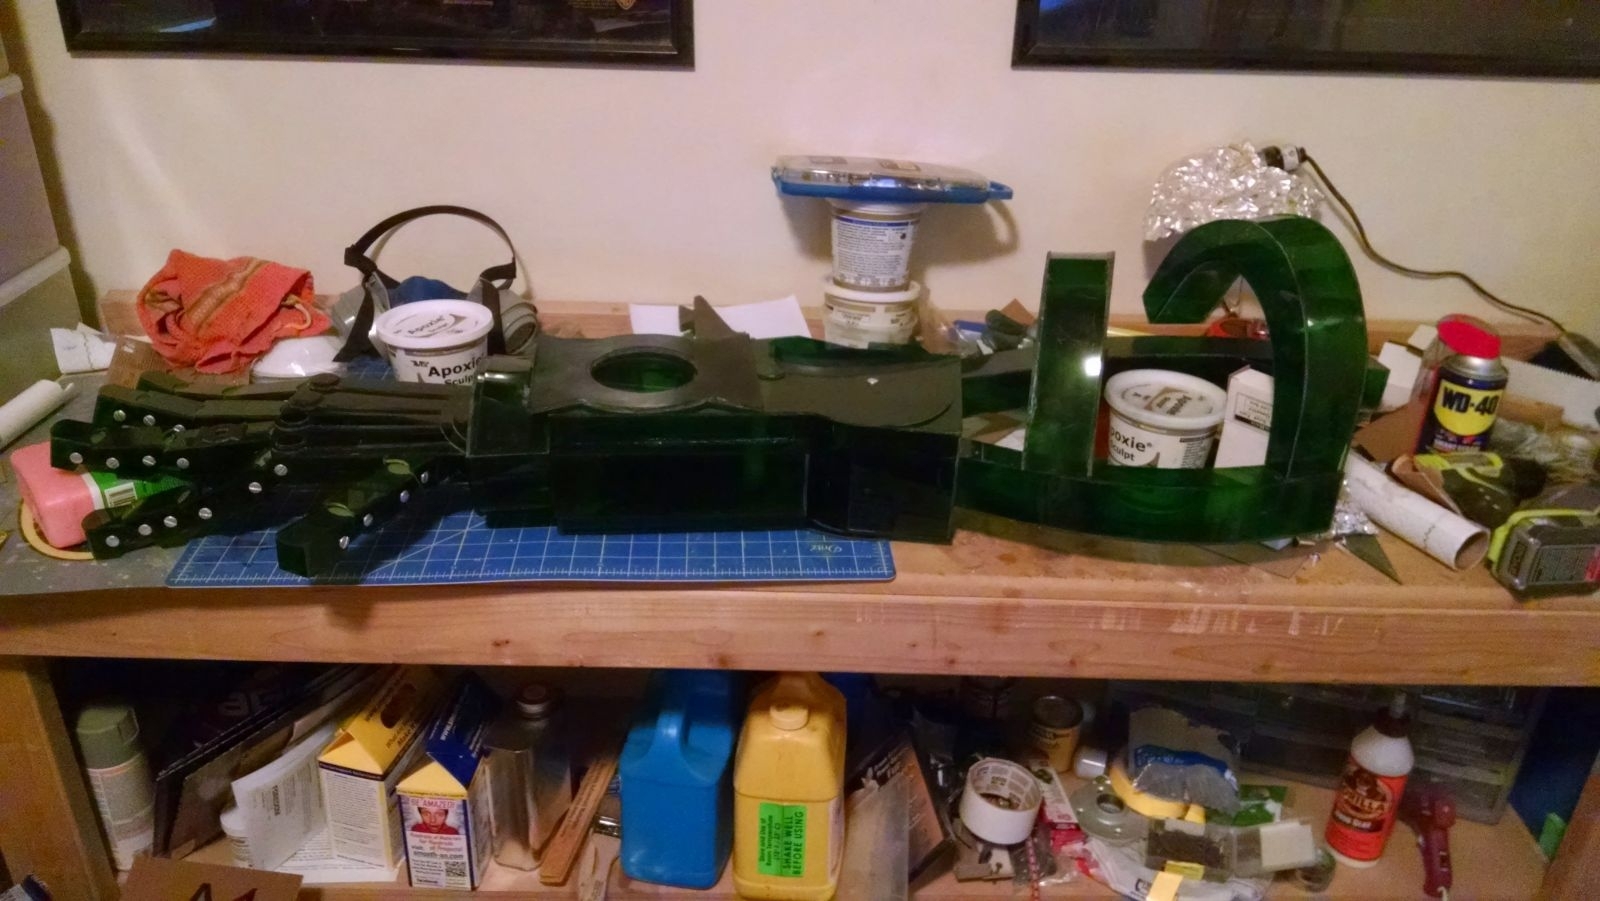
The upper arm wasn't all that different from the forearm except for the fact that it's almost entirely built of curved pieces. This meant cutting out a large rectangular piece, curving it by hand with the heat gun, tracing out a pattern for one side, gluing it together, then tracing out the pattern for the other side. Since I was so low on time first I just built the elbow box and the two main swooping curves that run roughly parallel to my arm. When I tried it on Fenix correctly pointed out that while the forearm looked awesome the upper arm was... underwhelming. I sighed, because she was right, and gave up 3 hours of sleep the night before the convention to add two more big curving pieces. Ideally, if I had more time and plastic, I would have also had the big curving shoulder pieces that the model has, but when I was done with everything I had enough plastic to add one more curve if I wanted, but that was it. Definitely not enough for the big shoulder piece.
The other tricky part with building the upper arm was making sure that I had enough space for my arm to pass through the elbow box, including at the elbow joint where it could rotate up to 90 degrees. However I didn't want any more empty space than exactly that amount because I didn't want there to be gaping holes in the construct that you could see my hand through. I think I was reasonably successful with this, though some minor tweaks/improvements could have been made.
Putting It All Together
With the hand, forearm, and upper arm finished it was time to attach the forearm to the upper arm. I went to slide the upper arm into the forearm and realized somewhere along the way my numbers had been off and I had made the elbow box on the upper arm 1/4" too large. This meant I had to cut the top off of the elbow box, sand it down, and re-glue it so that it would fit. After doing that it was as simple as drilling out holes for the screw posts and inserting them. Ta-da! The upper arm and forearm now formed a cohesive whole.
Now that the arm was together I still needed to have a handle inside with which to hold the entire thing and to provide push-back when I tried to use the pull cords. I reached into the arm and figured out where my fingers should ideally be positioned to access the pull cords. I marked the forearm, drilled out a hole the perfect size for a piece of PVC I cut down for this exact purpose, slid it in, and glued it and some end-caps in place to hold it. The glue kept it from sliding out and the PVC was pressing directly against the acrylic when I held the arm. I then sanded down a bunch of edges that rested against my real arm while it was inside of the construct arm to reduce how much it would scratch me up.
I also did a final pass where I checked for gaps between edges (where I failed to sand them down evenly, or when I was bending the curved pieces using the heat gun and I accidentally twisted them a little). If I found a gap I filled it with hot glue; not because hot glue is actually very strong, but I figured it was better than nothing.
Potential Improvements
One thing that people said again and again was that they thought the arm should light up. This was part of my initial plan, but time got the better of me. I was also worried that with how translucent the entire thing is that adding more wires and batteries would make it not look as good. That said, it wouldn't be that hard to stick a small battery pack and a light in the forearm where my hand goes.
The other big improvement to be made is adding some padding to the few spots that my arm rests when holding it. By the end of two days wearing this thing my arm was very scratched and bruised. A little padding in the right spots would probably go a long way.
The final improvement could be the length of the pull cords. I made them slightly too short. To grab them I have to shove my hand in past the handle, slip the cords onto my fingers, then force my hand back behind the handle. Then I have to keep my fingers in the loops to make sure I don't have to do it all again. The pressure of the cords on my fingers started to hurt after a while and slightly cut off circulation.