


This tutorial is a year overdue, but better late than never. For our cyberpunk variants of Hawkman and Hawkgirl I decided to finally make some motorized, lit wings. Really, there's no other way to say futuristic other than with moving parts that light up. I initially came up with two different plans for wings, but in the end my initial plan for Hawkman failed. This meant a last minute change to mimic the method I used for Hawkgirl's wings - that method is the one I'm going to discuss in this tutorial.
Materials
- 12V, 90 RPM DC motor (Hawkgirl), Servo and controller (Hawkman)
- Clamping mount for motor
- Battery pack
- ON/OFF/ON DPDT Snap in Boat Rocker Switch
- 7.5" aluminum channel
- (2) 3" Gears, 32 Pitch Acetyl Hub Mount Spur Gears (96T)
- (2) 1.5" Gears, 32 Pitch Acetyl Hub Mount Spur Gears (48T)
- (2) Swivel Hubs
- (2) Face Tapped Clamping Hubs
- (4) Spacers
- (2) End Clamps
- (2) 1/2" Stainless Steel Precision Shaft, 3" long
- A bunch of hex bolts of various lengths
- (2) 3/8" carriage bolts, 3" long
- (2) 3/8" nuts
- Acrylic sheeting
- PVC sheeting
- LED tape
- Wires
- Switch
- Solder
- Wing nuts
- Electrical tape
- PVC Pipe
Wing Blades - Building (~13 hours)
As with most of my fabrication I started out making patterns out of cardboard. This helps give a sense of scale that you can tweak until it's just right. Once I was happy with the size and shape of the blades (I decided to do four blades per wing) I transferred the patterns for one wing to the acrylic sheet. I then cut these out with my band saw.
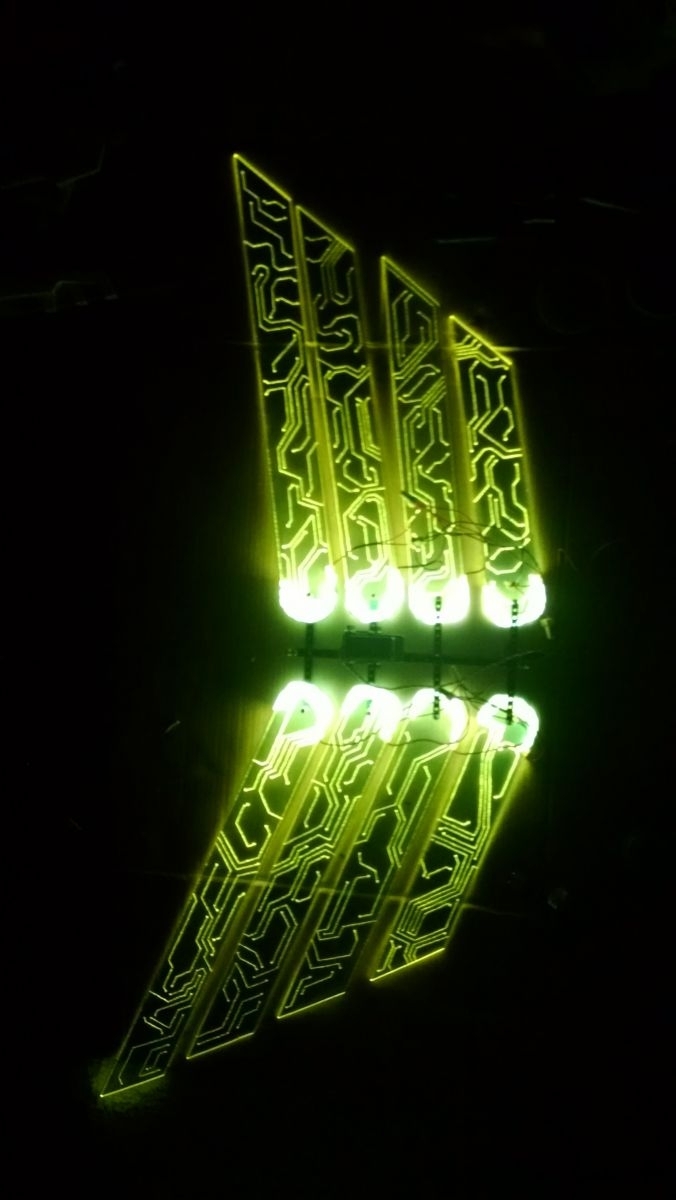
For Hawkgirl I then patterned out where the light channels were going to go and cut those out as well. This made every blade two pieces. I then traced those pieces onto the acrylic sheet and cut them out for the other side. I then patterned out the channel covers on the PVC sheeting and cut those out as well. Once all of those pieces were cut out (2 channel covers per wing blade) I glued one channel cover to each wing blade. I then proceeded to put the LED tape in the channel. I then soldered some wire to the LED tape, leaving plenty of excess on the wire so that it wouldn't get pulled. With that done I superglued the other channel covers onto the blades, hiding the LEDs and creating cohesive wing blades.
For Hawkman I didn't make light channels. Instead, after cutting out all of the wing blades from the acrylic, I came up with a circuit board pattern that I drew out on the protective paper on the acrylic. Once I was finished sketching out the pattern I went at it with an engraving tip of my rotary tool, etching the pattern into the plastic itself. I created LED end caps on the Hawkman wing blades out of the LED tape and wonderflex. First I soldered the wires to the LED tape, then I used wonderflex to attach the LED tape to the blades, with the lights facing inward. Hindsight: My original plan for Hawkman's wings did NOT have the blades resting on top of one another, so it didn't matter that the wonderflex created an uneven surface. When my original plan failed and I had to mimic the method I used for Hawkgirl this caused TONS of problems. If I were doing this over I probably wouldn't have bothered with the light caps.
Once the blades are built we need to drill the holes. Drill 1/2" holes for the shaft that overlap on all of the blades. This is the pivot point of the blades. To make sure they sit flush with each other I also glued some excess acrylic around the hole so that they didn't bend (due to the PVC on Hawkgirl's wings or the wonderflex on Hawkman's). Also be sure to drill tiny holes at the tips of blades 2-4 and roughly where those tips meet on blades 1-3; this is where we'll be feeding the fishing line through later. With the blades fully built it's time to set up the motorized portion!
Motorized Mechanism (~5 hours)
Attach the 1.5" gears to the swivel hubs and then attach those to the middle of the channel. Put the face tapped clamping hubs on the two outermost parts of the channel - the shafts should fit through the hubs. Tighten the clamps so that the shaft is sticking slightly into the channel, but is mostly sticking out the top. Next add a couple of the spacers and then the 3" gear (which is attached to the longest wing blade). Stack the remaining blades on top of that one in descending size, making sure they all are oriented in the correct direction. Once they are all on, attach an end clamp tightly so that each blade is resting snugly against its neighbors, but can still swing freely. Do this for both sides, making sure that both wings are in the same position (since you can't adjust this later). Next you can attach the motor to the channel - you'll attach the clamping mount, then slide the motor in such that it is snug with the gears. Tighten the clamping mount. Note that you might need to remove the bolts holding the shaft's clamping mounts because they might block access to the bolts for the motor's mount. The resistance of the motor should mostly keep the wings in place at this point. Make sure all gears are flush with each other! The absolute worst thing is if gears don't have a solid overlap. Hindsight: I really wish Servocity sold aluminum gears in the sizes I needed, but they don't. This would have helped with slight warping and shearing of the gears. The acetyl gears DO work, but aluminum would have been more reliable!
.jpg) With all of the mechanical parts connected you have to wire up the motor. With the DC motor you want to wire up a 3-way switch so that the motor can run in either direction. This is the tutorial I followed for wiring up the motor, and it worked great - Robot Room. Once the motor is wired up you should be able to hold the wings by the channel and toggle the switch to watch the primary wing blades raise and lower. Hooray! To make the rest of the blades move, too, you'll need to attach the blades together - I used fishing line for this. My personal choice is a blood knot. The trick to this part is making sure you tie the line at just the right length - too short and your blades won't have a good amount of spread and they probably won't collapse correctly either - too long and they'll have too much spread. You also need to be consistent on both sides so that they stay symmetrical. You might have to cut and redo some of the knots. Once the fishing line is tied you should be able to test the wings again, and this time they should all raise and lower.
With all of the mechanical parts connected you have to wire up the motor. With the DC motor you want to wire up a 3-way switch so that the motor can run in either direction. This is the tutorial I followed for wiring up the motor, and it worked great - Robot Room. Once the motor is wired up you should be able to hold the wings by the channel and toggle the switch to watch the primary wing blades raise and lower. Hooray! To make the rest of the blades move, too, you'll need to attach the blades together - I used fishing line for this. My personal choice is a blood knot. The trick to this part is making sure you tie the line at just the right length - too short and your blades won't have a good amount of spread and they probably won't collapse correctly either - too long and they'll have too much spread. You also need to be consistent on both sides so that they stay symmetrical. You might have to cut and redo some of the knots. Once the fishing line is tied you should be able to test the wings again, and this time they should all raise and lower.
Frame and Harness (~3 hours)
.jpg) The aluminum channel happens to fit nicely around a piece of PVC. I did an extremely basic frame from PVC pipe (1/2" diameter). For Hawkgirl's wings the motor would have stuck into her back if I tried to has the channel rest flush with her back, so I had to make it raised up a bit. Once it's glued together you can mark off where the bolts are going to slot through to keep the wings in place. Drill the holes, slot in the bolts, and tighten the nuts. The wings should now be firmly attached to the PVC frame.
The aluminum channel happens to fit nicely around a piece of PVC. I did an extremely basic frame from PVC pipe (1/2" diameter). For Hawkgirl's wings the motor would have stuck into her back if I tried to has the channel rest flush with her back, so I had to make it raised up a bit. Once it's glued together you can mark off where the bolts are going to slot through to keep the wings in place. Drill the holes, slot in the bolts, and tighten the nuts. The wings should now be firmly attached to the PVC frame.
The harness itself is fairly simple. For Hawkgirl's we just purchased some backpack straps off of Amazon and sewed them to the PVC. For Hawkman we got some webbing, a ring, and a couple of parachute buckles and sewed it all together. Hindsight: For this outfit the crossed straps really didn't work for Hawkman; it's his iconic look, but I didn't have the hawk logo covering the ring, they were white straps that got lost in the white of the jacket, and it totally ruined the lines of the jacket.
Final Wiring (~2 hours)
.jpg) All that's left to do now is finish wiring up the LEDs and building a little holder for your switches so you can easily access them. Start pairing up wires for the LEDs, matching similar colors. I tended to not group more than two at a time just to avoid super thick clumps. I used the wing nuts, though you could probably get by with just electrical tape if you wanted. Once all of your wires have been reduced down to just one positive and one negative you can wire it all up to your battery pack and a switch. It's up to you how long you want your wires to stretch; my original plan was to have a belt that my switches and batteries would hook onto for Hawkman, but we ended up cutting my belt so it hooked onto my harness. It ended up being a little bulky for the harness. Hawkgirl's wires weren't quite as long as I wanted, to they just sort of dangled up and over her shoulder.
All that's left to do now is finish wiring up the LEDs and building a little holder for your switches so you can easily access them. Start pairing up wires for the LEDs, matching similar colors. I tended to not group more than two at a time just to avoid super thick clumps. I used the wing nuts, though you could probably get by with just electrical tape if you wanted. Once all of your wires have been reduced down to just one positive and one negative you can wire it all up to your battery pack and a switch. It's up to you how long you want your wires to stretch; my original plan was to have a belt that my switches and batteries would hook onto for Hawkman, but we ended up cutting my belt so it hooked onto my harness. It ended up being a little bulky for the harness. Hawkgirl's wires weren't quite as long as I wanted, to they just sort of dangled up and over her shoulder.
Problems
So while both sets of wings worked, they didn't work super well. By the end of the convention both wings were inoperable. I tried to jump while Hawkman's wings were up which ended up shearing the plastic gears; aluminum gears likely would have survived the jump. When I tried to repair it (switching which gear the servo was attached to, to avoid the stripped section) I couldn't get it to stay flush with the gear. I still don't know why this is. My guess is the plastic gear was bending slightly when it was moving; again, aluminum gears probably would have solved this issue.
Hawkgirl's wings had a different issue. One issue is that the motor didn't quite have the resistance to keep the wings in their "up" position on its own. I had to hold the wings in place for a second for it to stay in place and any real motion on Tori's part meant the wings would fall. The servo on Hawkman's wings definitely worked better in that regard, though it was nice not having limits on the motion of the wings for Hawkgirl's wings (because it couldn't slip gears and get out of whack, like it could with Hawkman's wings). What really did us in with Hawkgirl's wings was the smaller gears attached to the swivel hubs. For some reason the bolts on that came loose and we lost a gear at one point. This meant only one wing would go up. I repaired it using pieces from Hawkman's wings, but later the swivel hub itself came loose, so that it had way more play than it should have. The result of this was, again, only one wing going up. This could, in part, be due to the fact that I've been attempting to use these swivel hubs in multiple wing designs before I found one that worked. In some of the previous, failed wing designs they were under more stress than they should have been. Brand new swivel hubs probably wouldn't have failed in the way that these did. Also, similar to Hawkman's wings, if we had used aluminum gears they probably wouldn't have had any stress in a direction perpendicular to the direction they were supposed to move (but that's just a guess).
.jpg)