


 These are my build notes for just the Fem!Mordecai costume, not for Bloodwing. If you're looking for notes on bloodwing, they are here. Commission slots for Bloodwing are also currently OPEN if you're interested
Design:
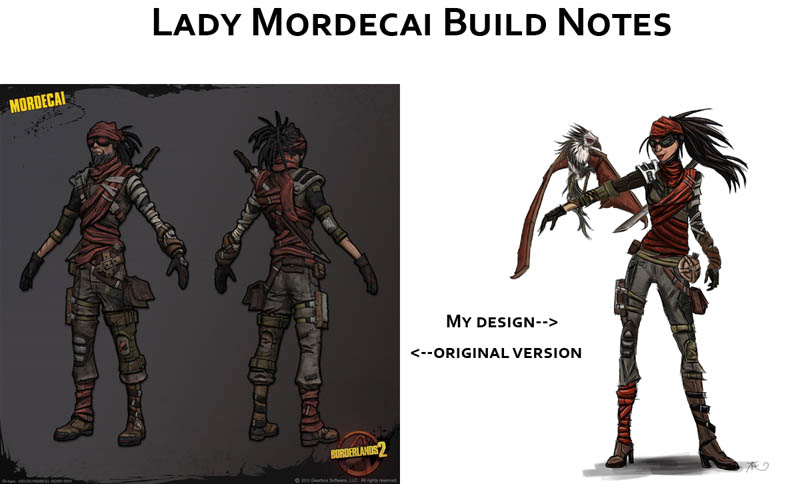
As I am an artist as well as a costumer, I first set about designing how my femme look would work. As you can see from the comparison, there's not a lot of drastic alterations between my version and the original look, most of the differences arise from the fit of the clothing (a more femine fit & style to the jacket, pants and shoes) and obviously the hair (and lack of facial hair). Mordecai's costume seems simple, but is actually deceptively complex as there are lots of tiny components to deal with.
I did actually alter the design a little bit in the construction/planning phase to reflect the fact that this costume would be worn at summer cons and most relevantly, outside at Dragon Con (which is *HOT*). Instead of 3/4s sleeves, I went with short sleeves and to reduce construction times, I opted to purchase and modify the pants & vest.
Construction: Sword & Scabbard
.jpg)

Sword:
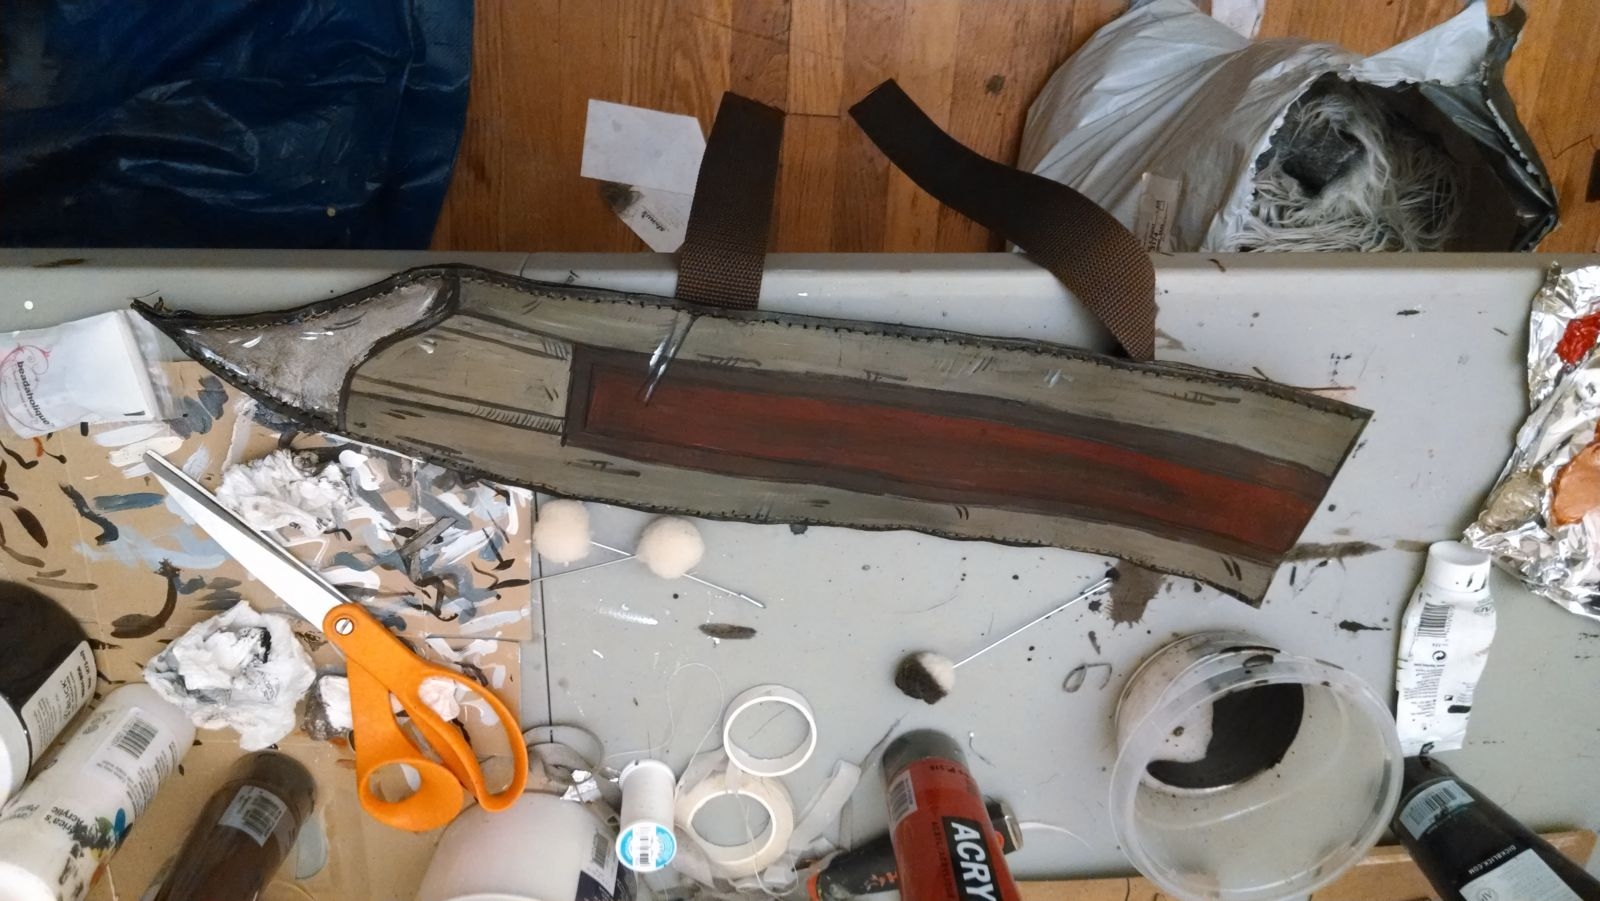
The sword was annoying because there's very little reference available- mostly we booted up Borderlands 1 in Steam and took a bunch of screenshots of the intro sequence where Mordy is flipping the sword around (which helped with both actual reference and relative size). I also found a nice close up of the sword model via google image search- My sword ended up being a little shorter/squatter than Mordecai's in game model, but whatever.
Josh carved the sword blade from MDF and made the handle out of foam and wonderflex (the wonderflex covers the foam, protecting it from denting and prolonging the life of the prop). I then primed it with a few coats of acrylic gesso and then used acrylic paints to paint it. I used a combination of really nice metallic paints mixed with normal acrylics to give it that bladed weapon feel. Once I was done/happy with the base paint, I went through and did all the cel-shading (with more paint, a teeny tiny brush and some very fine art pens). I mostly went off the reference for the cel-shading- though I tried to exaggerate it a bit in places because then it photographs better.
The Scabbard:
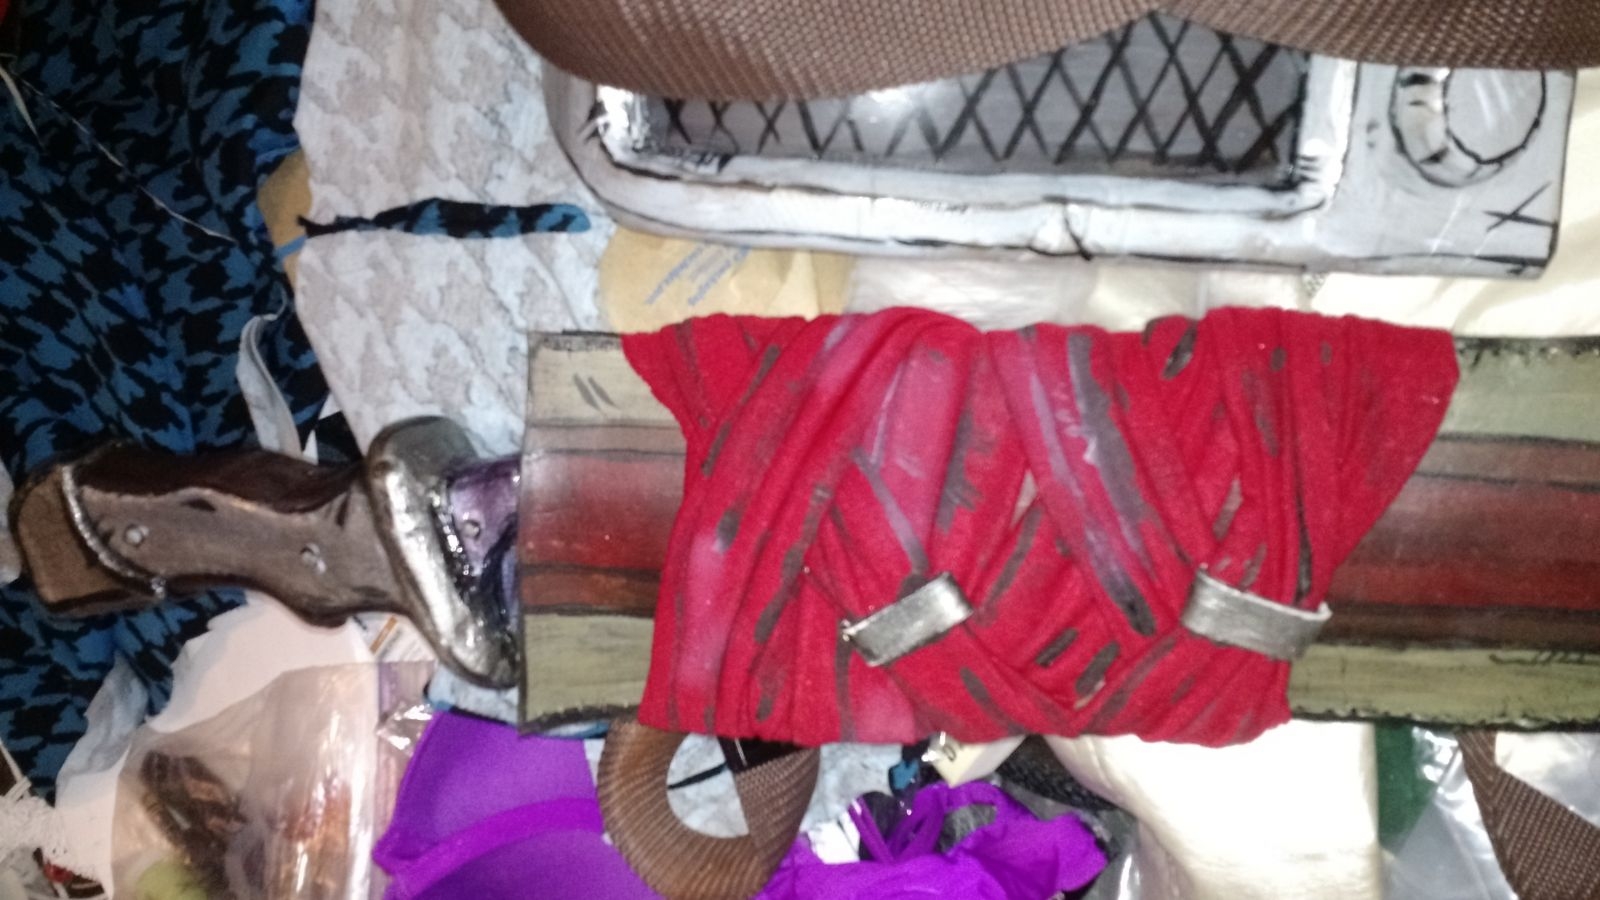
The scabbard I created out of veg-tanned leather and wet molded to the finished sword prop (once it was varnished). I traced the pattern of the sword on butcher paper to make the pattern of the scabbard and then hand stitched the scabbard pieces together (the strap piece is also hand stitched and glued to the back). Then I stained the leather buffalo brown with waterstain before painting it. For paint, I mostly went off the turnaround reference of Mordecai from BL2- you can see hints of the colors of his scabbard on his back and filled in the parts that you couldn't see. I then added the cel-shading and varnished it. Once that was finished, I sewed the red-wrap fabric to the scabbard- As you can see from the reference, it appears that his sword is sort of haphazardly stuck into his back wrappings. As I wanted to be able to easily take components on and off, I decided to just sew some of the red (cel shaded) fabric to the scabbard itself, so it would appear stuck into my back wrappings.
Pants!
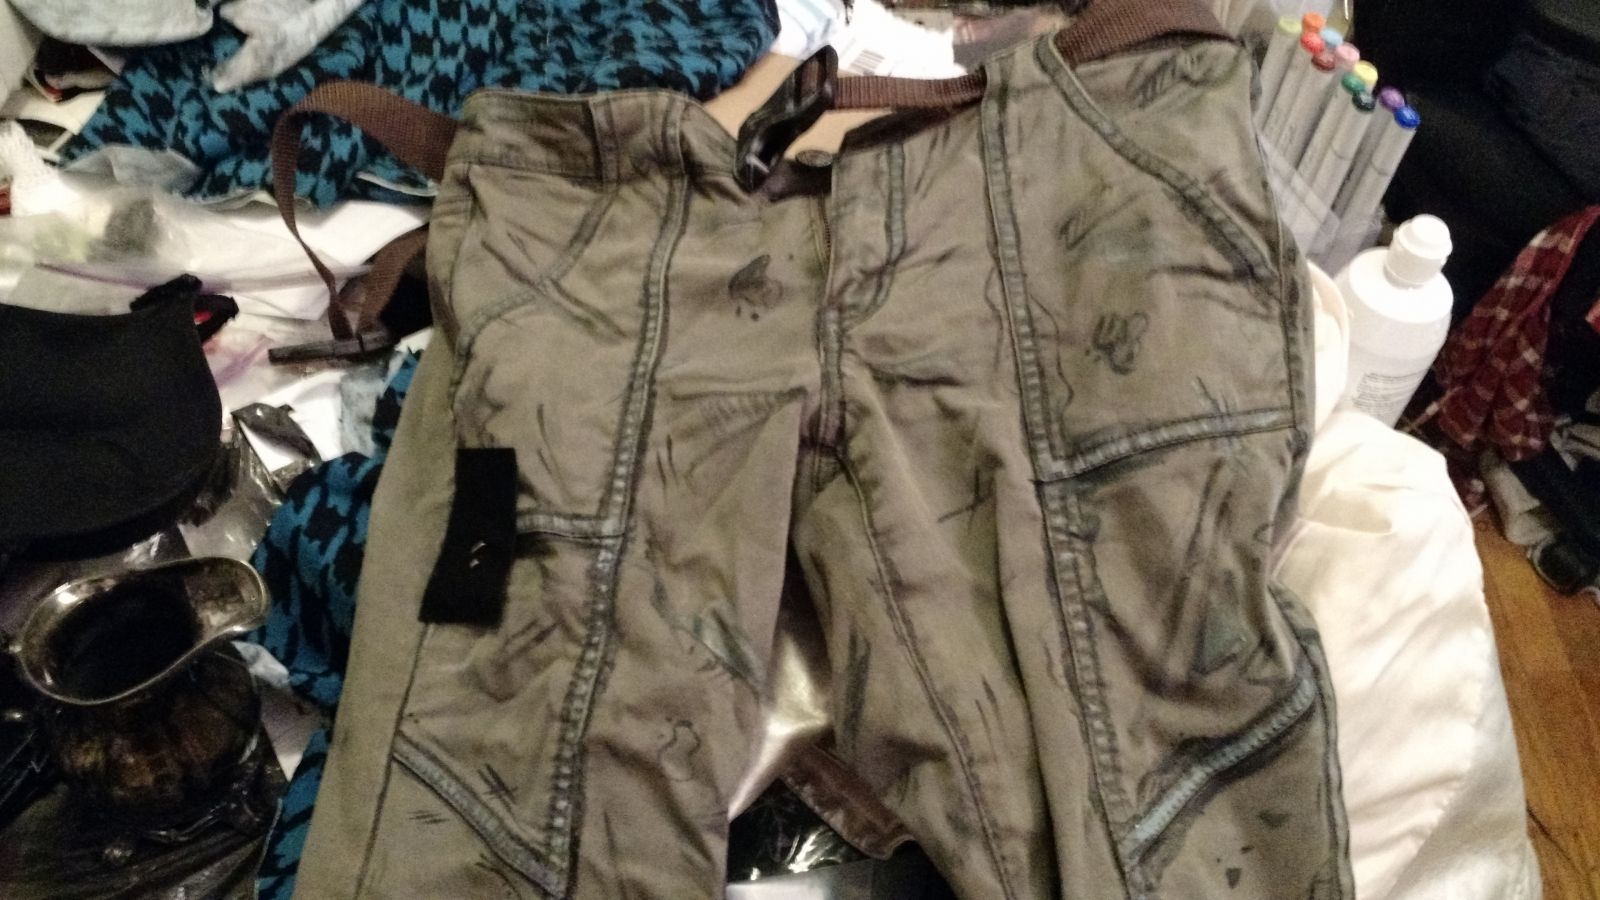
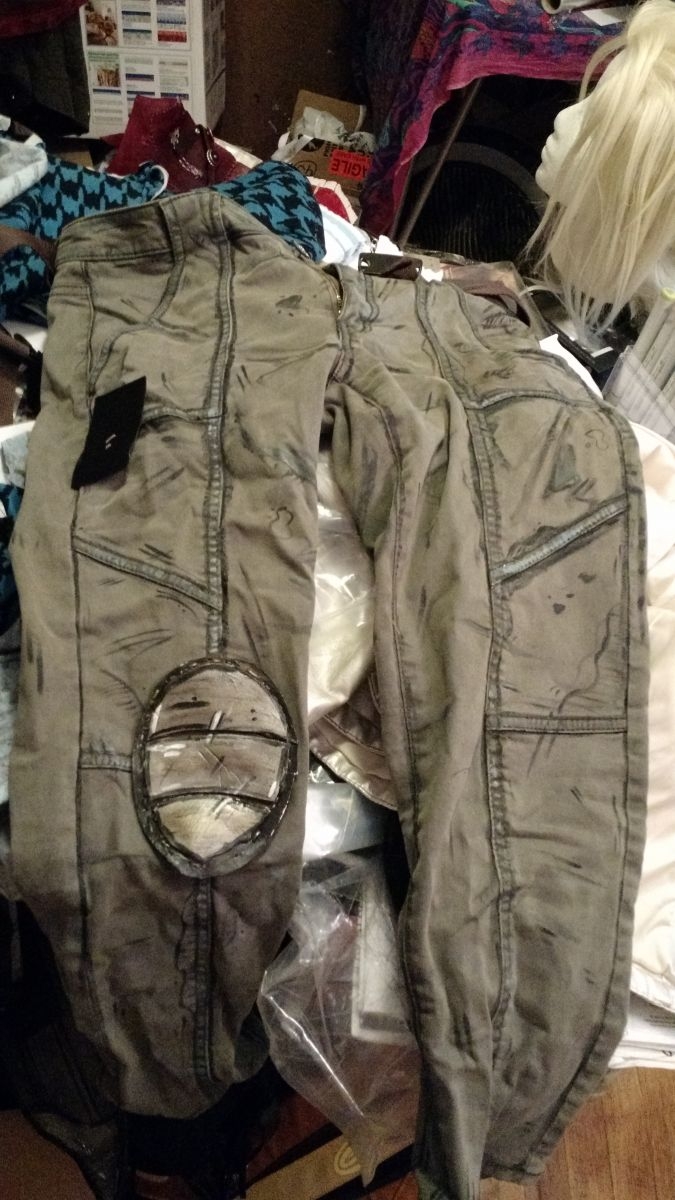
I did end up having to sew the knee pad to the pants as well as some velcro to the side glowy piece (still not sure what it's supposed to be- perhaps an Oxygen indicator?) so it would stay up on my leg and not slide down when I was walking.
The knee pad is made of layers of craft foam (gessoed, painted, sealed) and then attached to the pant using a combination of waxed thread and a whole lot of glue (I used hot glue initially but it didn't hold. Ended up using super glue instead)
Shirt, Vest & Weird Torso/head Wrap thing:
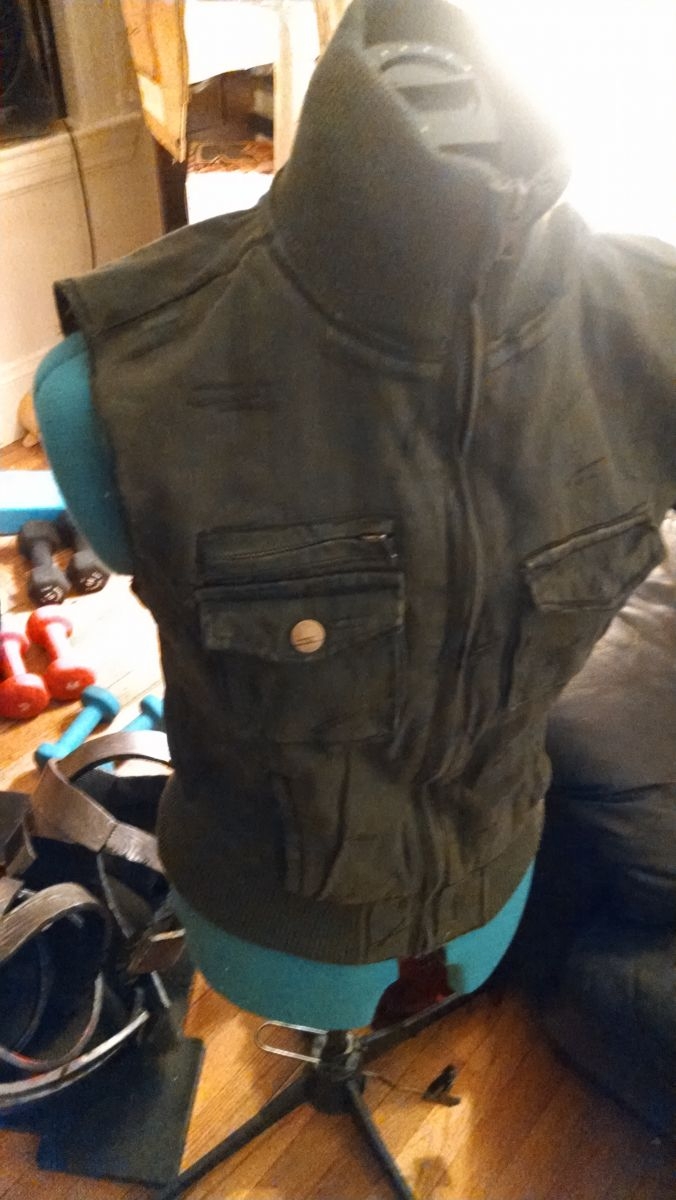
The Vest: Instead of trying to make the vest (because making stuff from scratch is really time consuming and we were attempting to complete 8 new costumes for Dragon Con in about 3 months time), I actually found a military style jacket that was close to his (the bits you can see anyway) on ebay and cut off the sleeves. I also ended up bringing in the seams significantly so that it *really* fit- since Mordecai's costume has so many layers, I definitely didn't want to add bulk to it.
Once it fitted the way I wanted it too, I went about distressing and cel shading it (same method as the pants).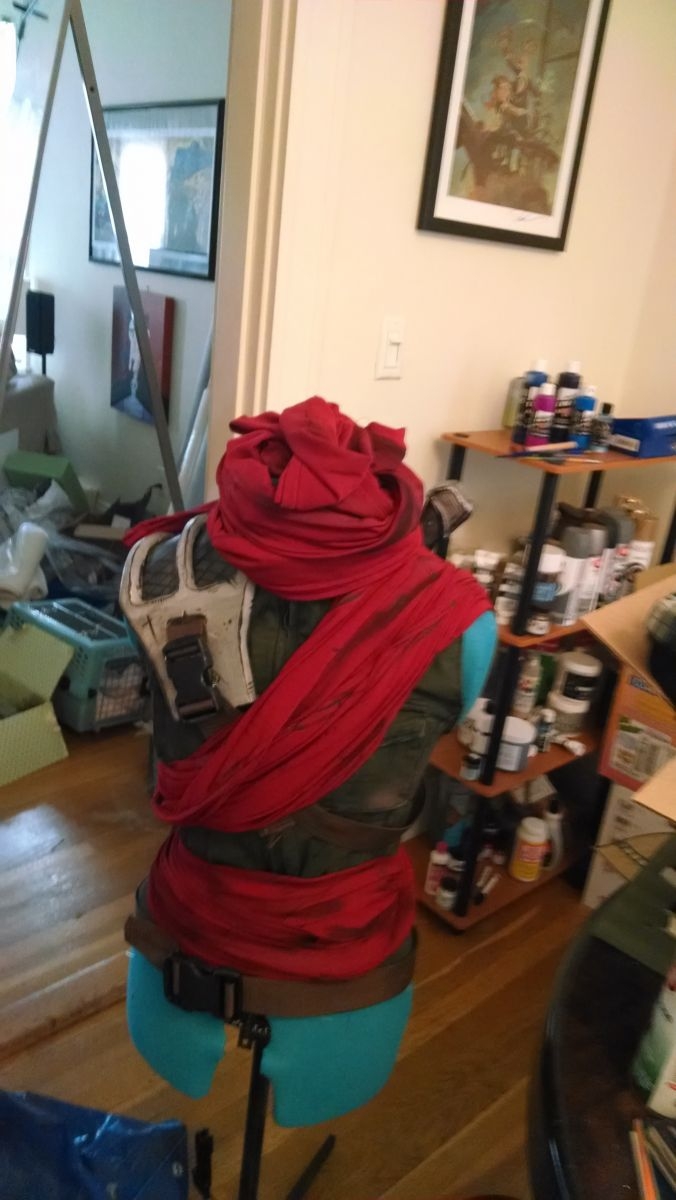
Shirt: For the shirt, I used a black short sleeve underarmour compression shirt. Mostly since it wasn't going to be seen much and I already had it in my wardrobe. Also for the wicking since I knew I'd be wearing this costume at Hot Cons like Dragon Con.
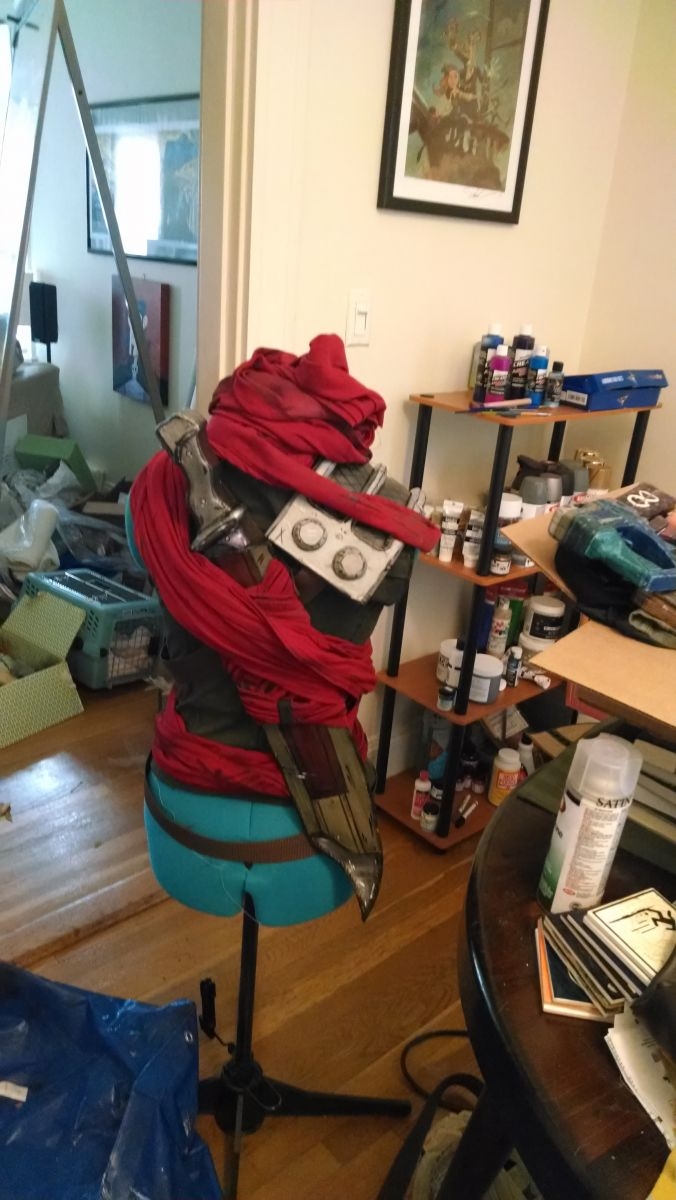
Torso/Head Wrap: For the torso (and the head wrap), I got relatively high quality red jersey fabric (Incidentally this is the same fabric that I used for my Iorveth cosplay. I ordered it from Mood Fabrics). I figured out how long I wanted each wrap to be (by wrapping it around the mannequin and myself) then sewed the fabric together (so it looks good on both sides). Then I added the cel-shading to both sides of the fabric using both brushes and the airbrush.
A Note on the wrapping: I actually didn't use anything to secure either wrap. The Head wrap ties to itself and the excess wraps around my neck. The Torso wrap tucks into the neck wrap and then the only trick with that is to do it as tightly as you can and then tuck it back into itself at the bottom.
I wore an under-corset under everything to achieve a slightly more cinched/skinnier look at Connecticon but it was incredibly uncomfortable to wear so I didn't really bother with it at Dragon Con.
Wig:
.jpg) I did some research into doing dreadlock wigs but they seemed slightly out of my range as far as my own Wig-fu goes so instead I made cartoony dreads by spraying the hair into spikes. I used my atomic wonder woman wig for this (it's a Jareth Lace front from Arda Wigs). I got the spikes to stand up straighter using wig clips and hanging the wig head upside down (a wig stand is very useful here).
I did some research into doing dreadlock wigs but they seemed slightly out of my range as far as my own Wig-fu goes so instead I made cartoony dreads by spraying the hair into spikes. I used my atomic wonder woman wig for this (it's a Jareth Lace front from Arda Wigs). I got the spikes to stand up straighter using wig clips and hanging the wig head upside down (a wig stand is very useful here).
I used a combination of got2b freezing spray and glue to get the "dreads" to stay in- it held up rather well through both Connecticon and all the hijinks of Dragon Con.
Makeup: 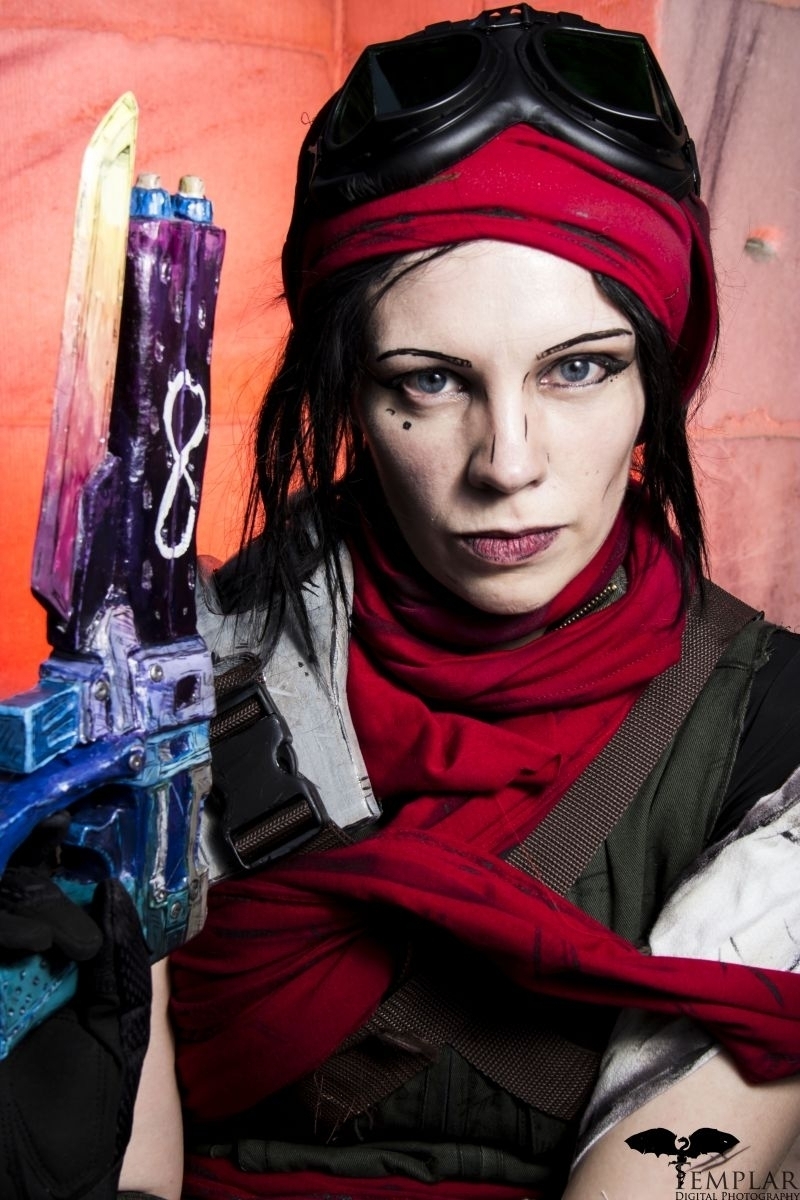
Makeup-wise I pretty much looked to the female borderlands characters' makeup more than Mordecai's (you can't see a lot of his face, so that's less than helpful). I didn't bother with contacts this time around, but you probably could get circle contacts the way I did for Maya to push it more (they weren't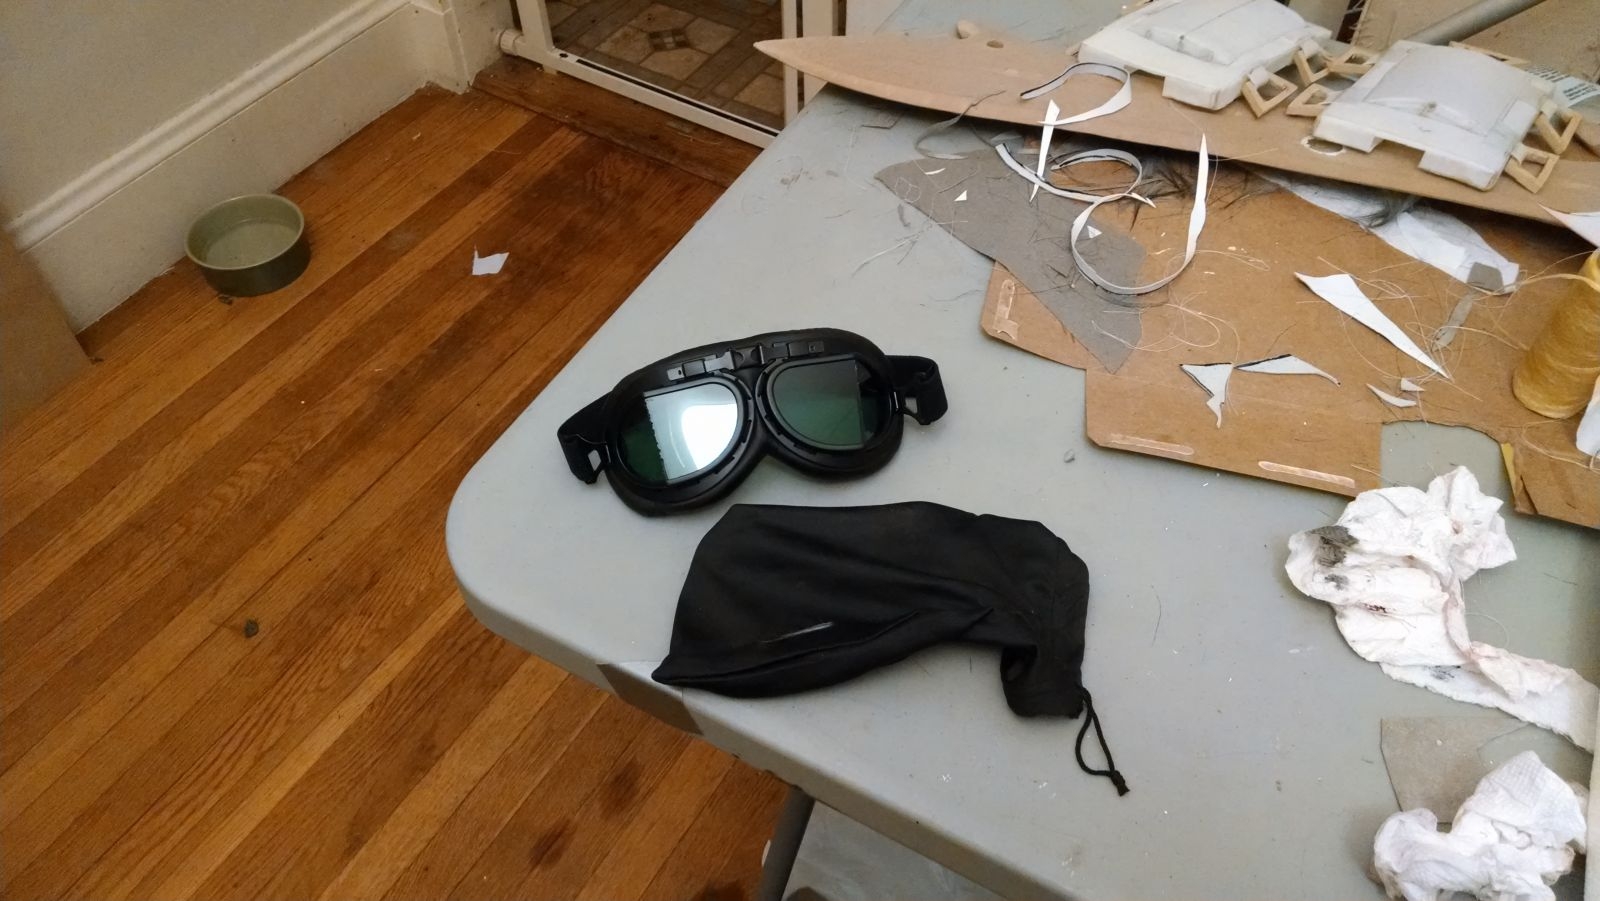 really worth the eye irritation for me this time round). I followed my usual makeup routinue- added the cel shading lines with a liquid eyeliner pen (I like to use Stila brand, but you can also use any middle-high quality liquid eyeliner for this. Make sure it does nice clean lines and is waterproof)
Goggles:
The goggles were originally motorcycle googgles with clear lenses. We popped out the original lenses and Josh made new lenses from green acrylic and replaced them. Originally I was going to wear them on my face, but they basically took over my wee-tiny face, so I ended up wearing them on my head. Since I *was* going to wear them on my face, I didn't want to interfere with my vision so didn't add cel shading to them.
Armor, Boots & Accessories:
Shoulder Armor:
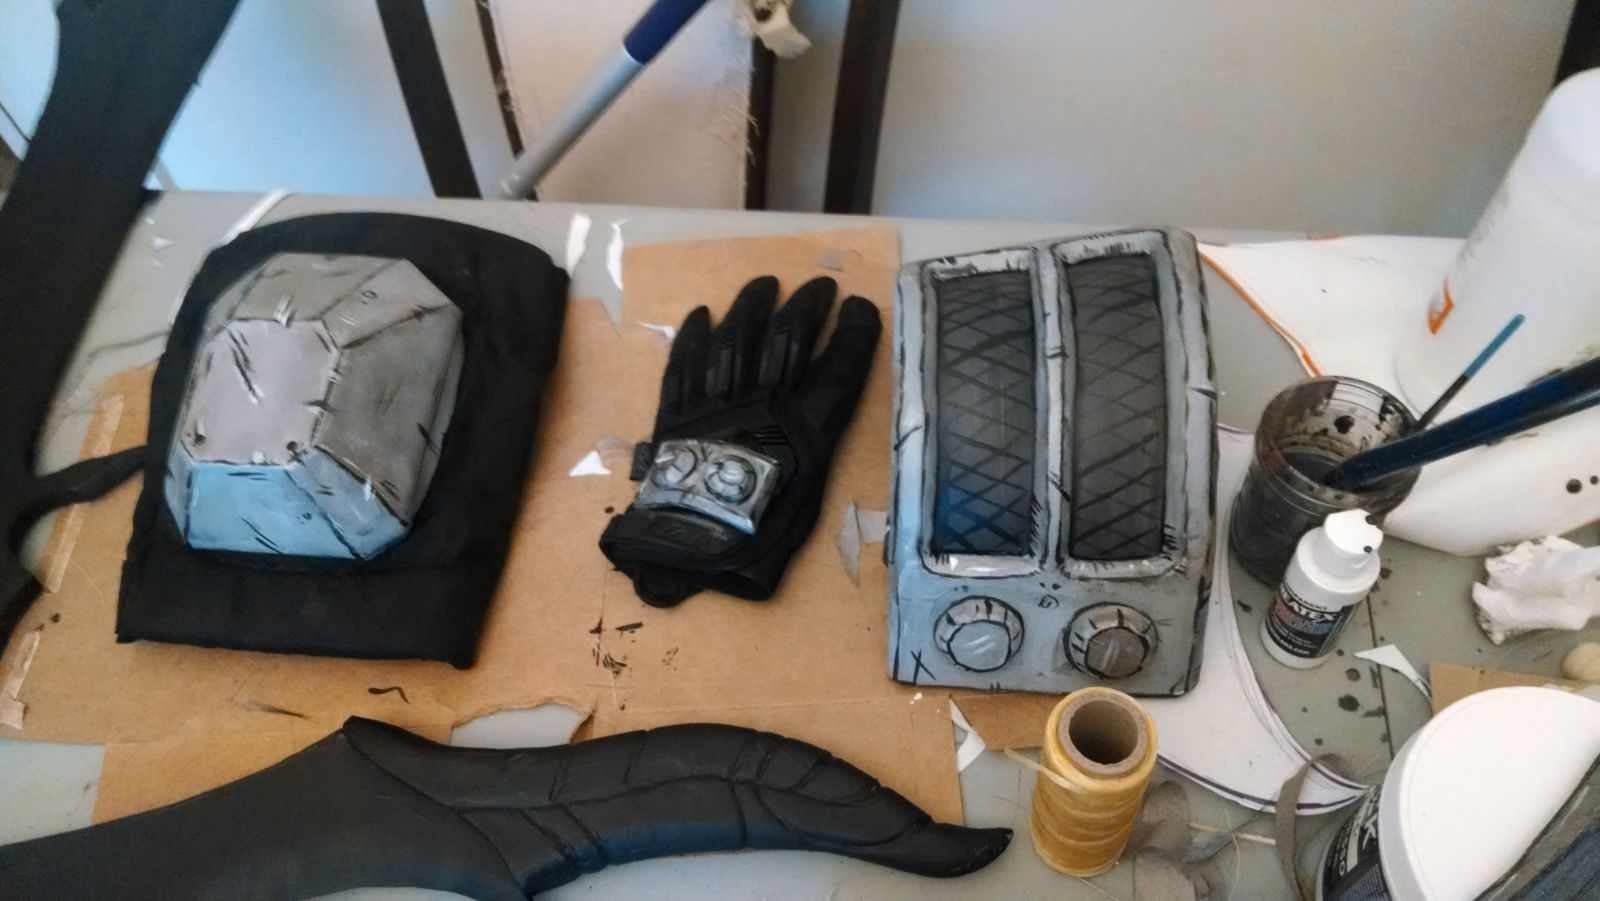
The shoulder armor is made of EVA foam with the sculpted knobs carved out of pink insulation foam. It was then painted with acrylics. We had to special order the parachute buckle from the internet as it's huge.
Glove plate: This is also made from EVA foam. It's attached to the glove with superglue which held up pretty well (I recommend against hot glue- it just doesn't hold up and it's probably not worth the burns)
Left arm vambrace: The vambrace itself is made of Eva foam and Pink foam. The wrap that holds it on is made of extra leather and just pulled tightly with the buckles. The decoration on it is just painted craft foam.
Left arm wrap: This is actually just cotton muslin fabric that I painted with cel shading and airbrushed (to give it a slightly dirtier look). I wrapped it to my arm and attached it under the vest with a safety pin. The picture to the right (->) is from Connecticon and it slipped down my arm a bit, so for Dragon Con, I used wig tape to secure it to my arm better.
Right arm elbow cover: This is made of green twill. The straps are attached to it and it buckles with very tiny parachute buckles. It was kind of a paint to make. The left knee brace was also made the same way, but it kept bunching and didn't add much to the costume, so I left it off for Dragon con. If you wanted a functional knee brace, I'd get a sports brace and paint it/cover it with the fabric you like.
Flask/Canteen: For this prop, I got an army surplus canteen and repainted it the correct colors. I attached the cross straps and buckle to it permanently with glue. It attaches to me in two ways (yay redundancy)- there's a strap with a snap on the back and an extra tie around the lip- this keeps it from hanging off weirdly (or forcing me to put my hand on it to keep it on my pants).
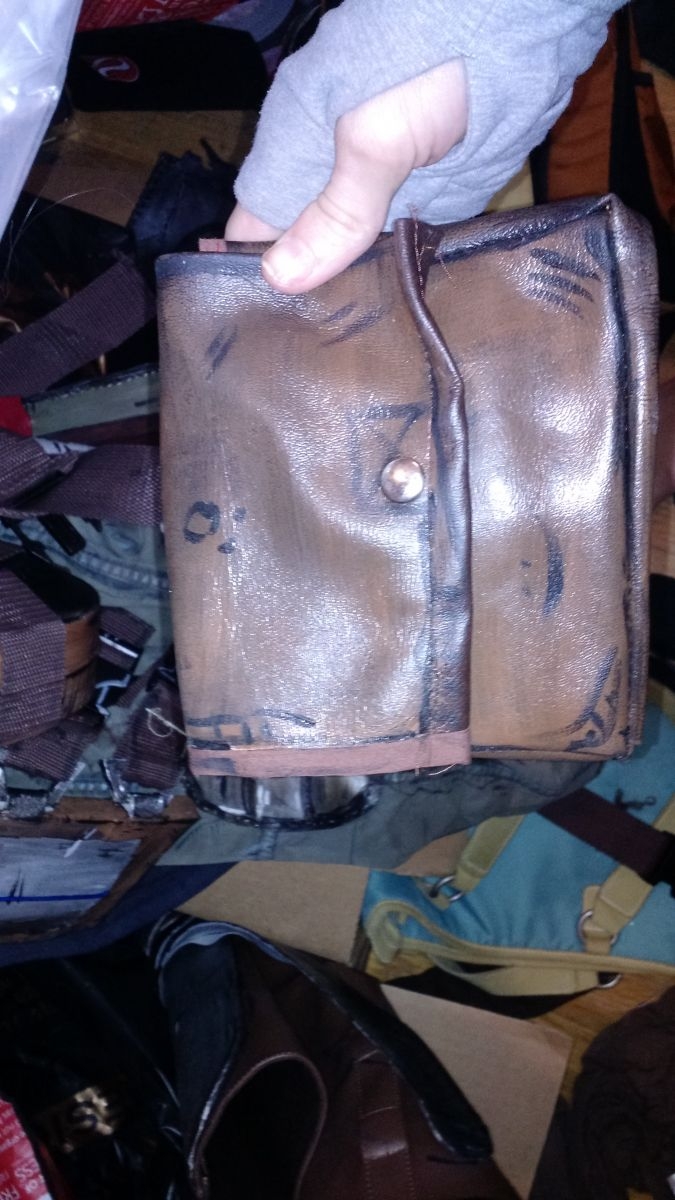 The bag: The hip bag I made from scratch (I found a free pattern via google search and modified it to be the size I wanted) out of faux leather and brown cloth. It's lined and closes with a snap- it was very useful to have to carry business cards and a phone! I painted it with acrylics to add the cel-shading and so forth. It attaches to a secondary belt (the flask was also attached to this belt), to prevent the problem I had with Maya (with too much stuff pulling my pants down!)
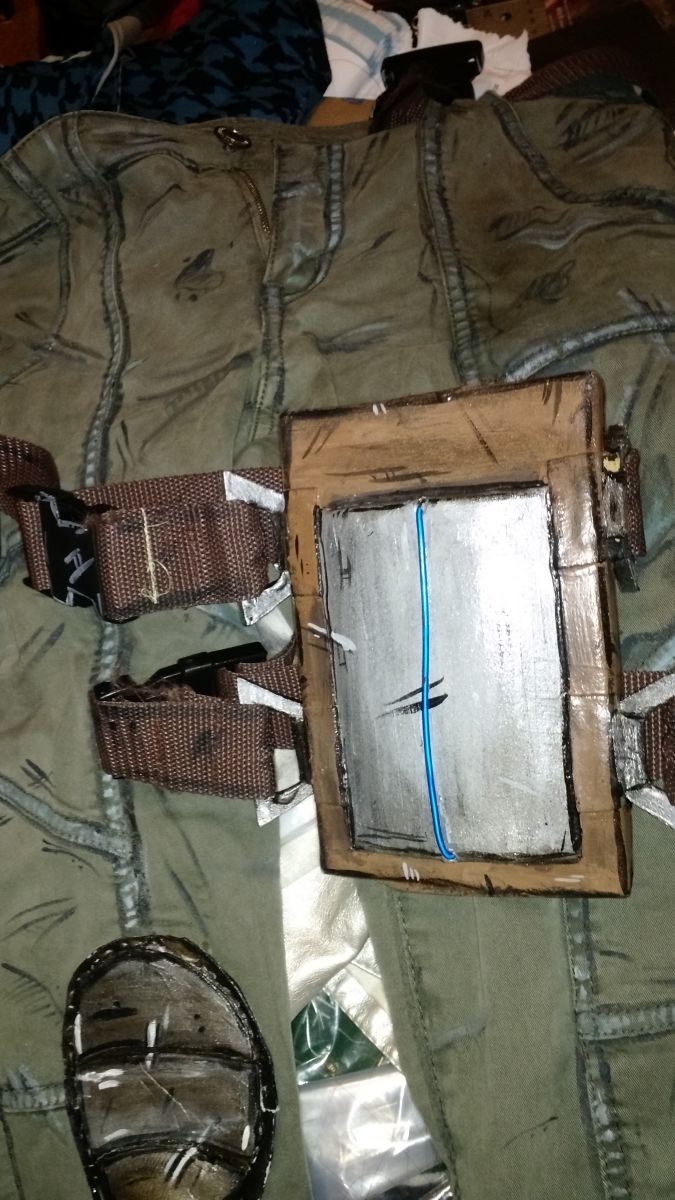
Digistruct Device: Josh carved these out of pink insulation foam and then covered them in wonderflex. He added a spot for batterys down the back and embedded EL wire down the middle so they would have the right effect (and we can turn them on and off). Painted with acrylics and sealed up. The side buckle loops are MDF and were attached with wonderflex (pre-painting), the straps are made of webbing (you can get a whole roll of webbing from Amazon and cut it down as you please- very cost effective! Make sure you seal the cut edges by burning/melting them). It attaches to my leg by both the straps and the velcro on the back (which attaches to my pants).
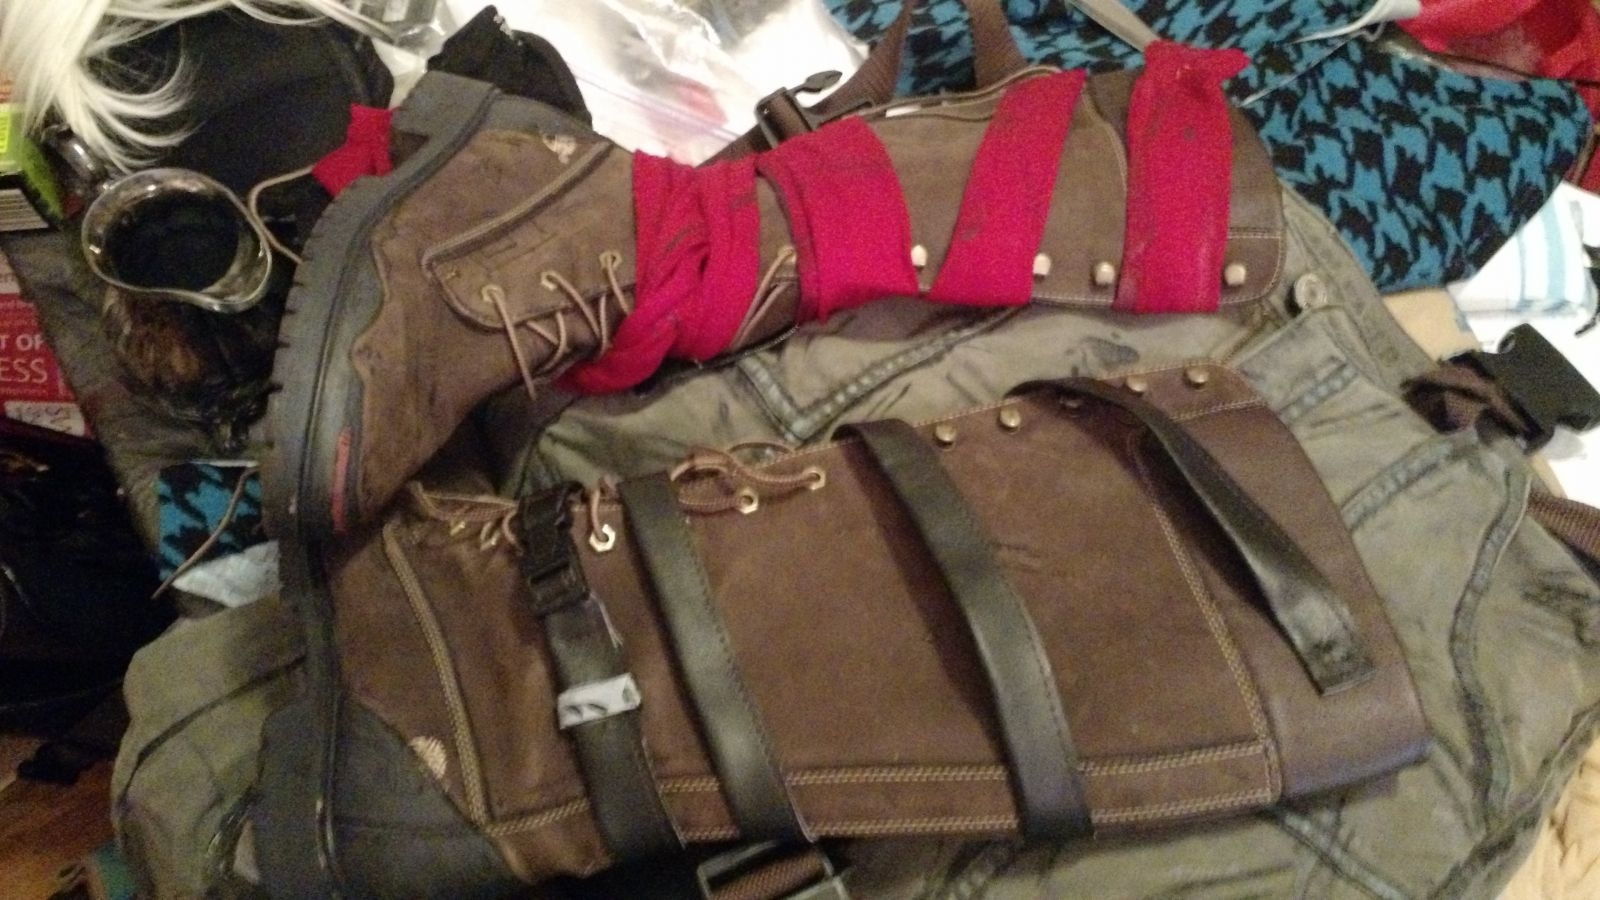 Boots: Borderlands boots are all really weird looking but I decided that the most important aspect to me was the grippy stuff on the bottom and the shape. I found boots that I liked via ebay (they are Timberland tall hiking boots) and added the red to the toe as well as all of the cel shading. Since his boots are asymmetrical, I sewed the red wrappings (pre-shaded the same way I did the head & torso wrap) to the top of the right boot and then wrapped it around when I was wearing it and tucked it back into itself. For the left boot, I made the straps out of vinyl (faux leather) and the ornamentation out of foam. I sewed the longer half to the top of the boot and the bottom with the rest of the buckle to the base/side of the boot- then again just wrapped it around and buckled it once I had it on.
They worked great!If I ever retire Mordecai and do a new version of Maya (a possibility), I'll probably re-use these shoes.
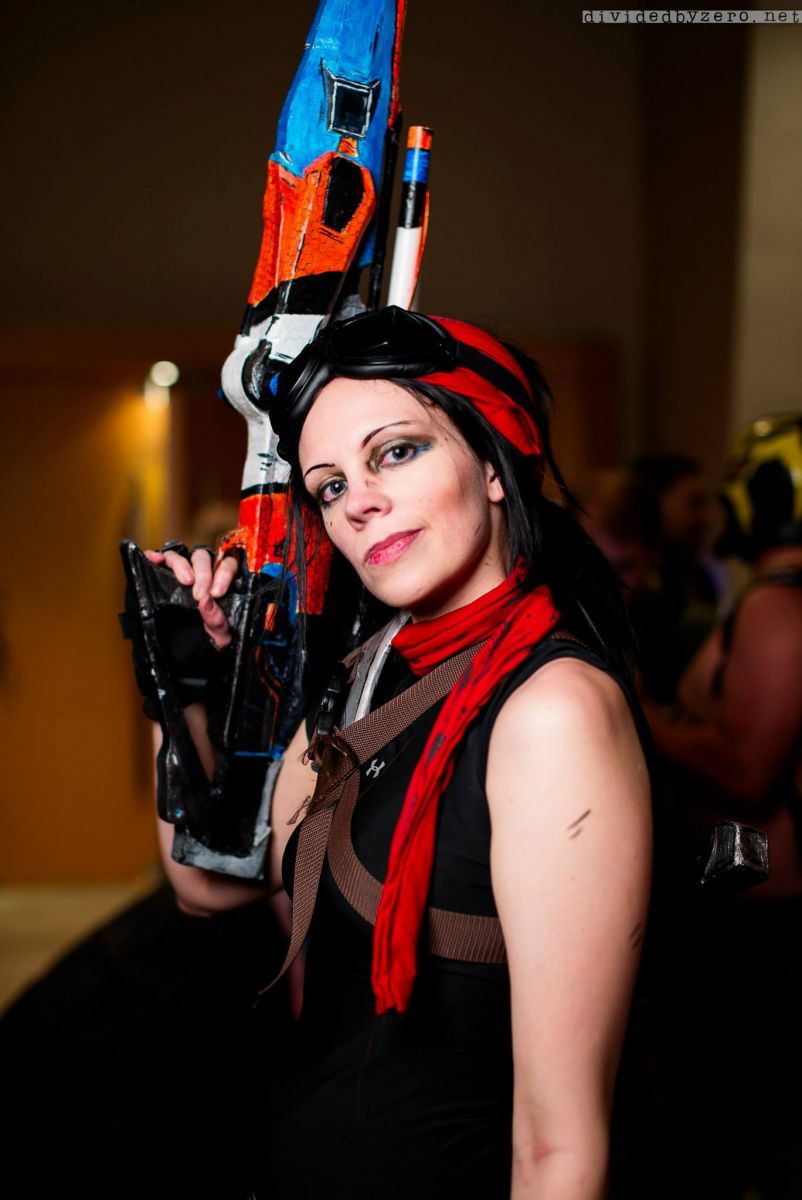
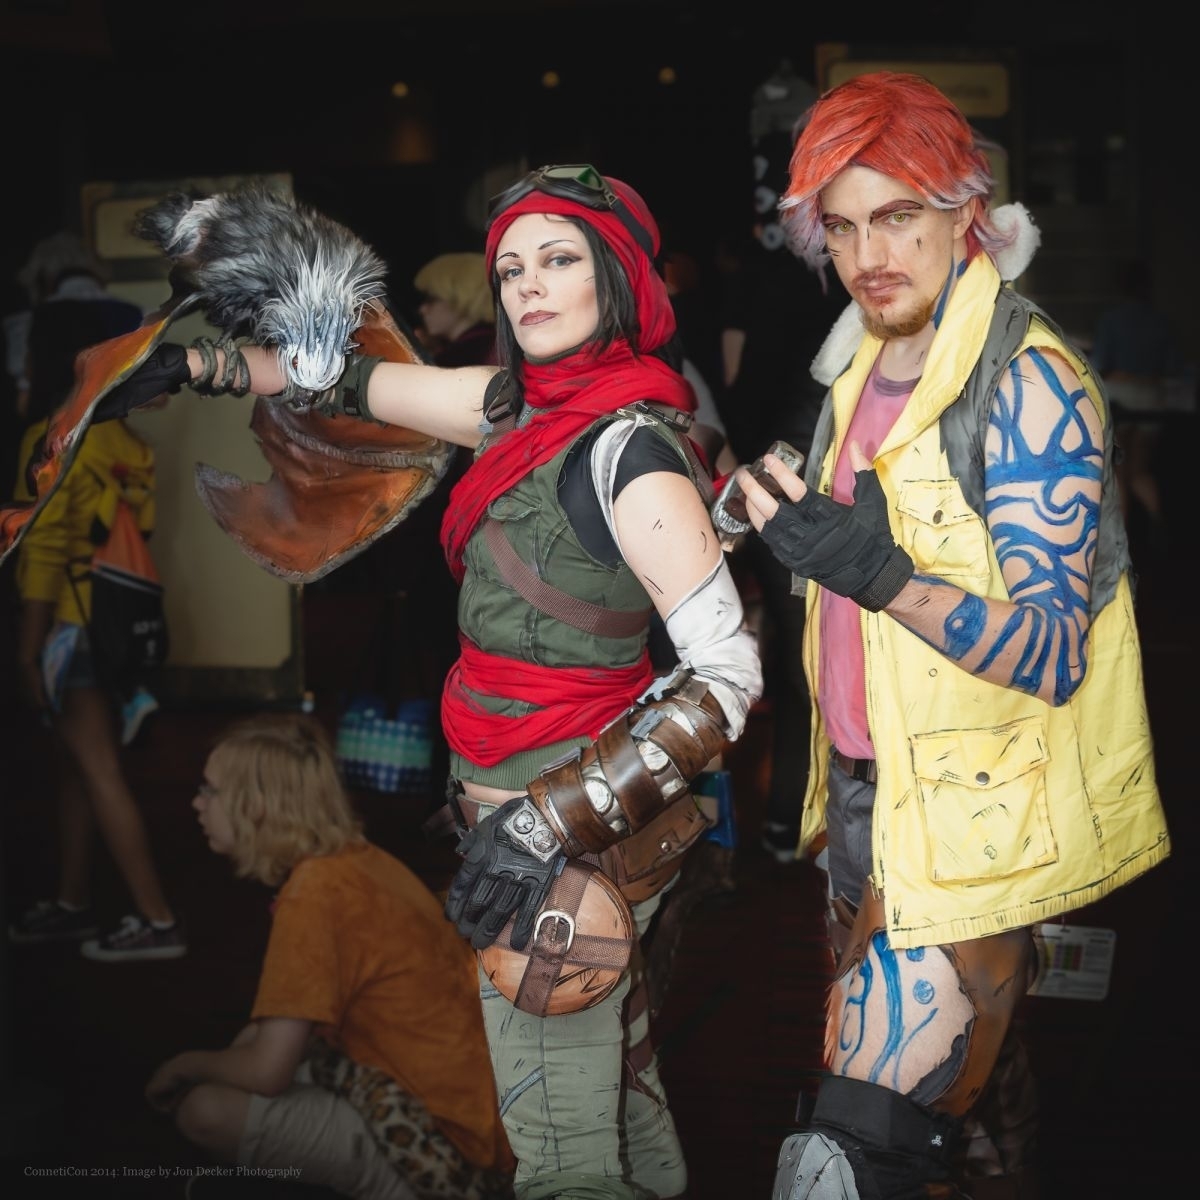
Guns: I just re-used the guns we built for Zer0 & Maya in this costume- I had the Vladof Infinity in its holster on my belt and carreid around the Maliwan Barking Railer for my nighttime Mordecai (when I didn't have Bloodwing with me).
Nighttime/Casual Mordecai: Since I didn't want to have all the heavy armor/stuff on me for Late Night Dragon Con Hijinks, I pretty much just took off the armor/vest/torso wrap and ran around like that. I added a bit more cel shading to my arms/body since bits were exposed without the wrap and so forth, but I was still pretty recognizeable *as* Mordecai in the stripped down version.
I believe that's everything! Hopefully this was helpful to someone! If you have any further questions or need clarification on something, please shoot me a message ! ~Fenix